TS3 Tutorials Archive

Would you like to react to this message? Create an account in a few clicks or log in to continue.
TS3 Tutorials Archive

Archives of The Sims 3 Tutorials

Latest topics

» Guide to Houseboats in game & in CAW by SimGuruSemedi, EA IP Forum
by Archivist Thu Apr 02, 2015 11:46 pm

» Guests May Post Here
by Archivist Mon Nov 24, 2014 12:45 am

» Fancy Friezes Using Corniches
by Archivist Mon Sep 22, 2014 11:07 pm

» Building Basics ~ Lessons for Beginning Builders
by Archivist Mon Sep 22, 2014 10:56 pm

» Caw FAQ's........Links to Tutorials, and Resources. Textures, & Troubleshooting from EA Caw Forum
by Archivist Sat Aug 16, 2014 3:27 am

» CAW tutorial - first contact by Anushka @ Carl and Pam's The Sims 3 Forum
by Archivist Wed Aug 13, 2014 2:56 am

» Steam installation, and Caw by LittleMinxUndr
by Archivist Wed Aug 13, 2014 2:29 am

» Procedural Generation of Terrain Discussion and Tips: Two Tutorials Posted
by Archivist Fri Jun 20, 2014 3:15 am

» Why CC Should Not be Packaged with a World, & How to Ensure it Isn't by Simsample, EA Caw Forum
by Archivist Sat Feb 08, 2014 1:38 am

» How To: Upload Caw Files to Share by auntielynds
by Archivist Sat Feb 08, 2014 1:29 am

» Pinstar1161 The Legacy Challenge Rules
by Archivist Sat Feb 08, 2014 1:12 am

» Building Apartments and Bars using EA's Shells by Richdre @ BMC
by Archivist Tue Nov 12, 2013 10:19 pm


    Building Basics ~ Lessons for Beginning Builders

    Archivist
    Archivist


    Posts : 220
    Join date : 2010-12-04

    Building Basics ~ Lessons for Beginning Builders  Empty Building Basics ~ Lessons for Beginning Builders

    Post  Archivist Mon Sep 22, 2014 10:35 pm

    Building Basics ~ Lessons for Beginning Builders by Cera @ The Simmers Society


    Lesson 1 - Creating a functional layout

    When we all start building the first thing we do is create a huge square house (a big box) with huge rooms. It takes our sims an hour to walk from the bedroom to the kitchen. We don’t worry about routing problems because everything is so far apart most of our house is full of empty space. While the space is nice, it doesn’t make for good “playability”. At the same time, we don’t want to pack a bunch of stuff into an itty bitty room because our sims start stomping their feet and refuse to use anything. We need rooms that are just right.

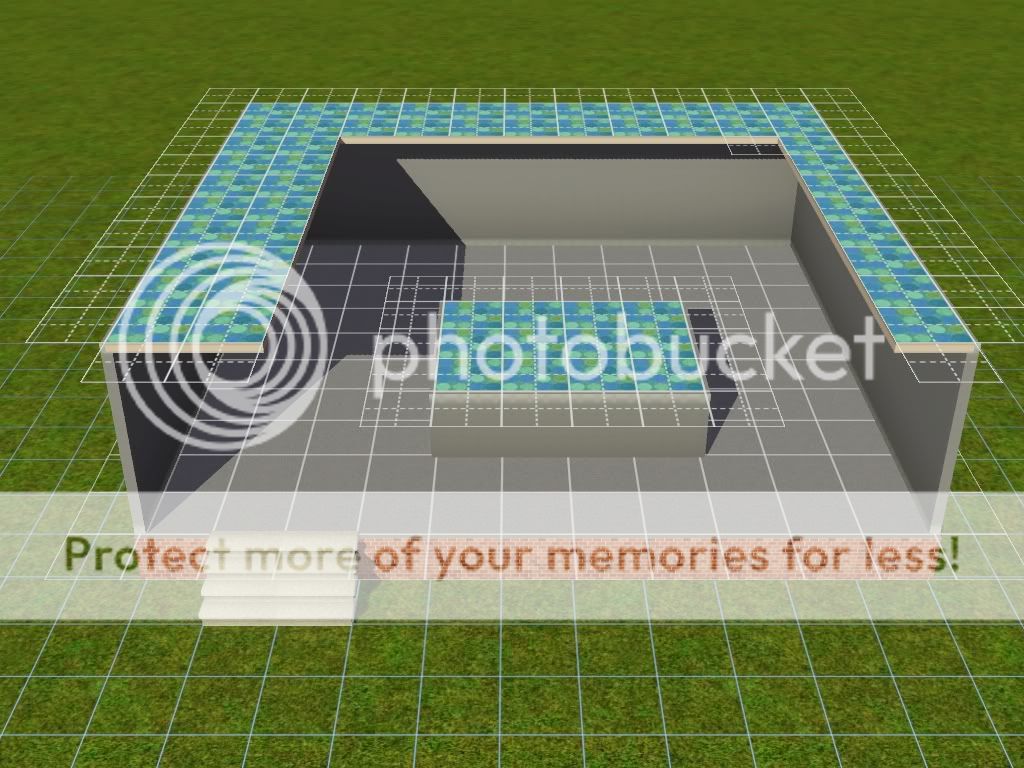
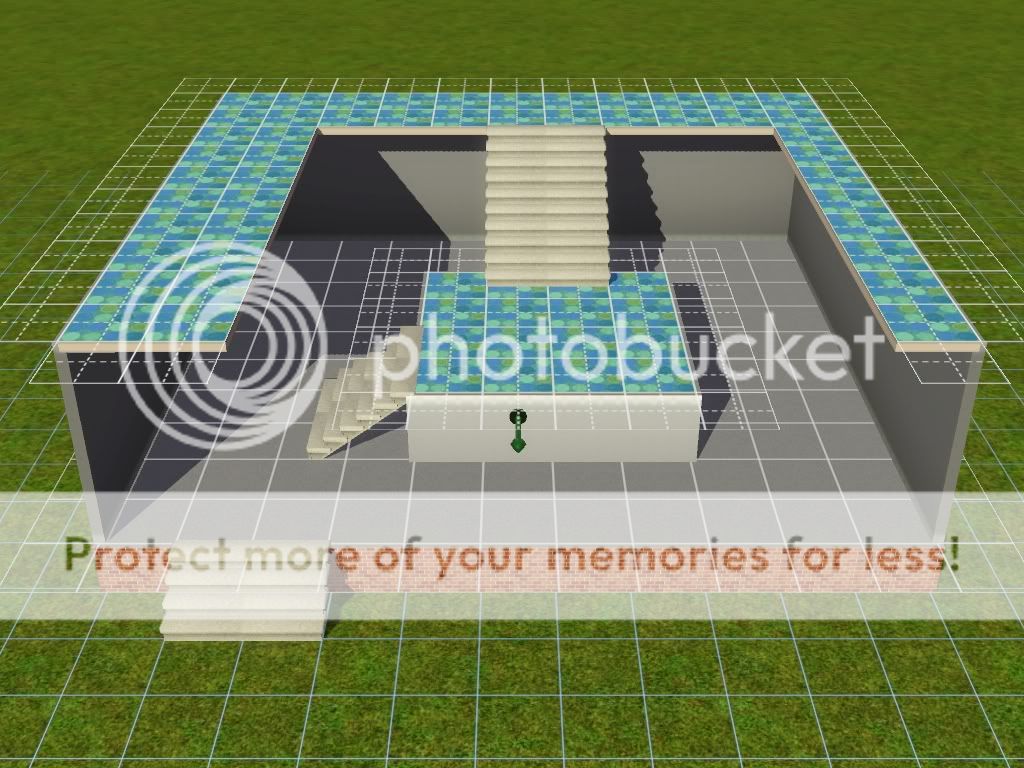
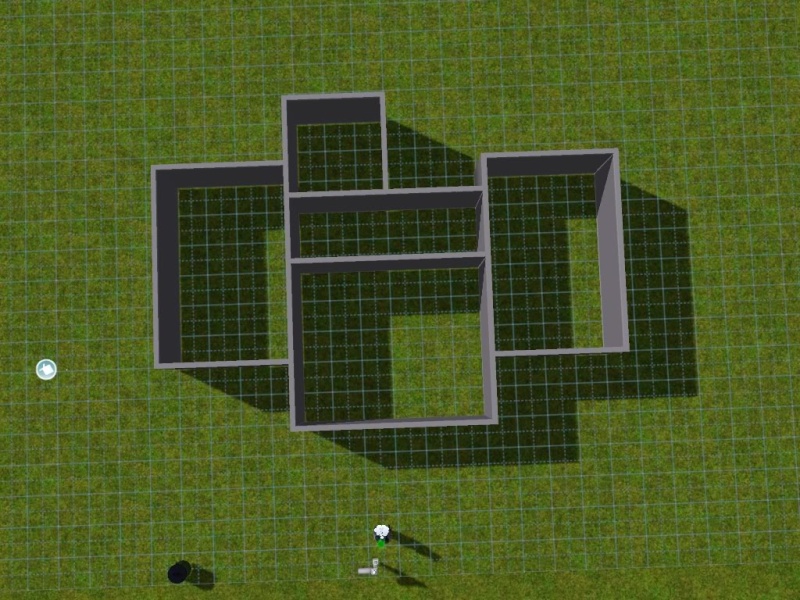
    For lesson one, you’re going to create an out of the box house by building the house room by room. The house you are creating is for a single sim, and your goal is to have functional room sizes and a house that is not a box. It needs to be a single story home with 1 bedroom, 1 bathroom, a living room and an eat in kitchen. Build on a small lot, 30 x 20. There are no budget restrictions.

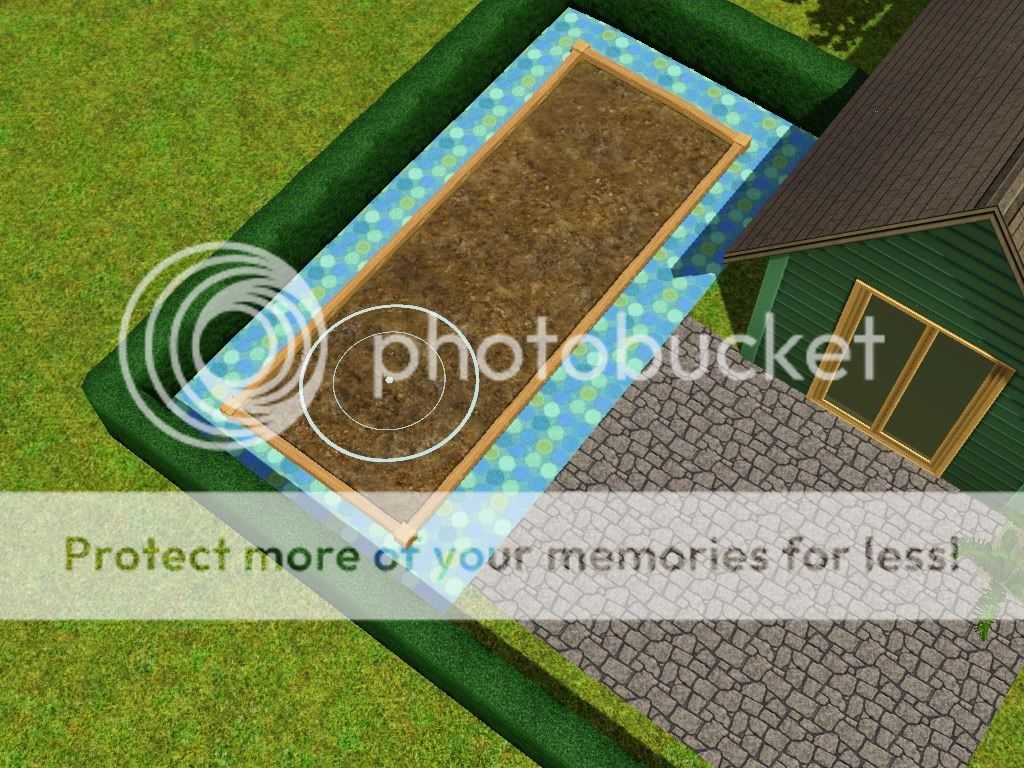
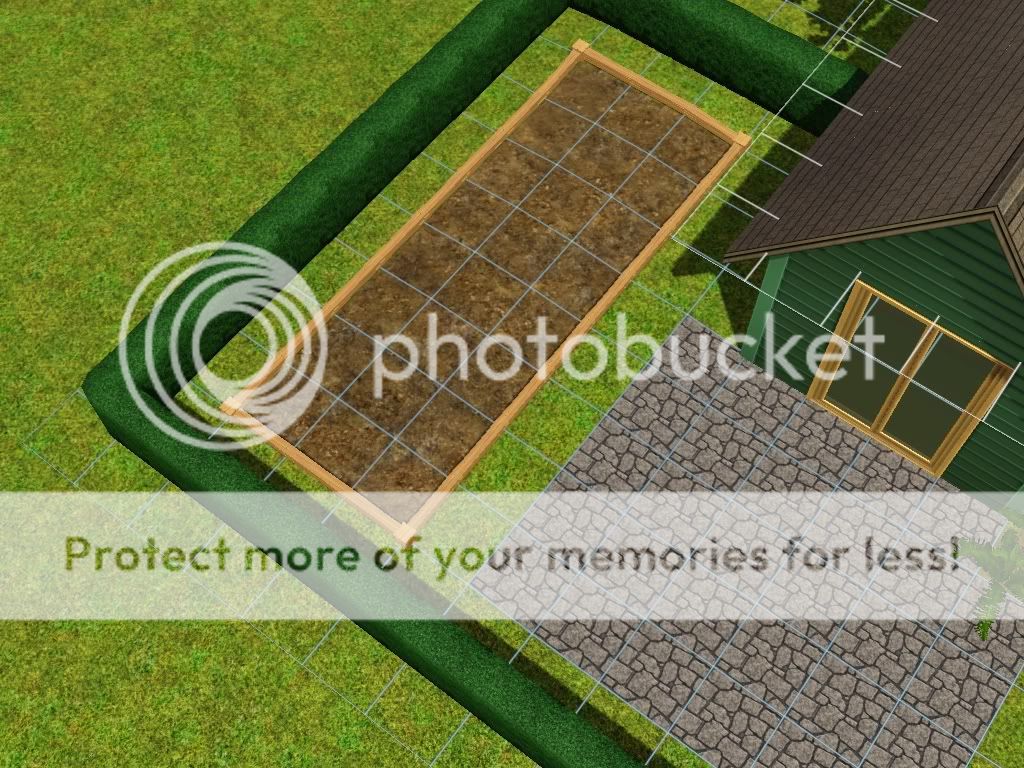
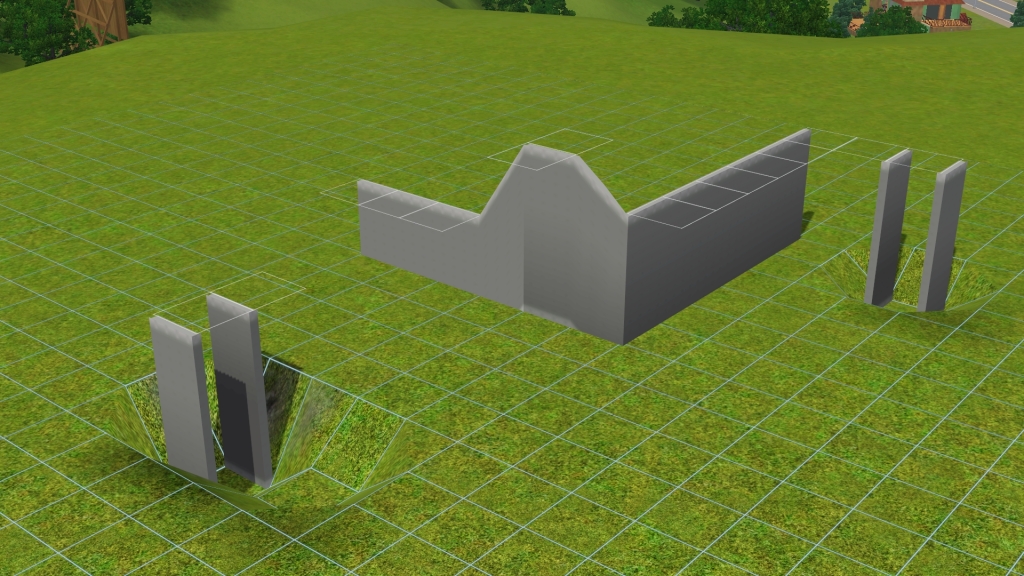
    Before you start building, it’s important to make sure the location your building on is level. For this lesson, use the level lot tool to ensure you build on a level surface. If you don’t, it can cause problems later.

    Building Basics ~ Lessons for Beginning Builders  1_flat10


    Room sizes are dependent on different factors and these should be considered when designing a home from a size of a starter up to a mansion. It needs to fit the style as well as the purpose of the build. For instance you would never have a grand size bedroom with a master suite in a starter.

    The main factors to consider when choosing an appropriate room size are as follows:

    - What sort of build is it? Is it a starter, loft, family home or a themed creation?
    - How many people will be living in the house?
    - Do you plan on expanding the house after the initial construction?
    - How many functions must the dwelling have?

    The amount of activities in a room and the rate at which it gets used is also an important consideration. A study might only be used for a few hours a day and might have a bookcase and computer so it only needs some single chairs and a desk, so therefore doesn't need much space. A living room on the other hand is used a lot for many activities so ensure you supply room for the different activities you are going have in the room. Remember a lot of living room items have multi functions such as the tv or stereo so ensure you leave enough space for the function that uses the largest space to keep sims happy if they want to dance or workout.

    The shape of the furniture tends to dictate the ideal shape of the room as well. For instance consider couch arrangements, one 3 seater and a 2 seater has a rectangular shape so it tends to look good in a rectangular room. It fits neatly without leaving dead areas that need to be filled. Saying that it depends on the layout you envision. Having some idea of the flow of the interior prior to building will allow you to design a home to fit the lifestyle you want to create.

    Now onto the nitty-gritty; here is a basic rundown of ideal room sizes based on house type. This is by no means a strict rule but for those new to building will allow you to develop your skills as builders.

    Starter home (1-2 bedrooms):
    livingroom - 5x4
    bedroom (main) - 4x5 to 5x5 depending on budget
    second bedroom - 3x4 to 4x4
    bathroom - 2x3 or 3x3
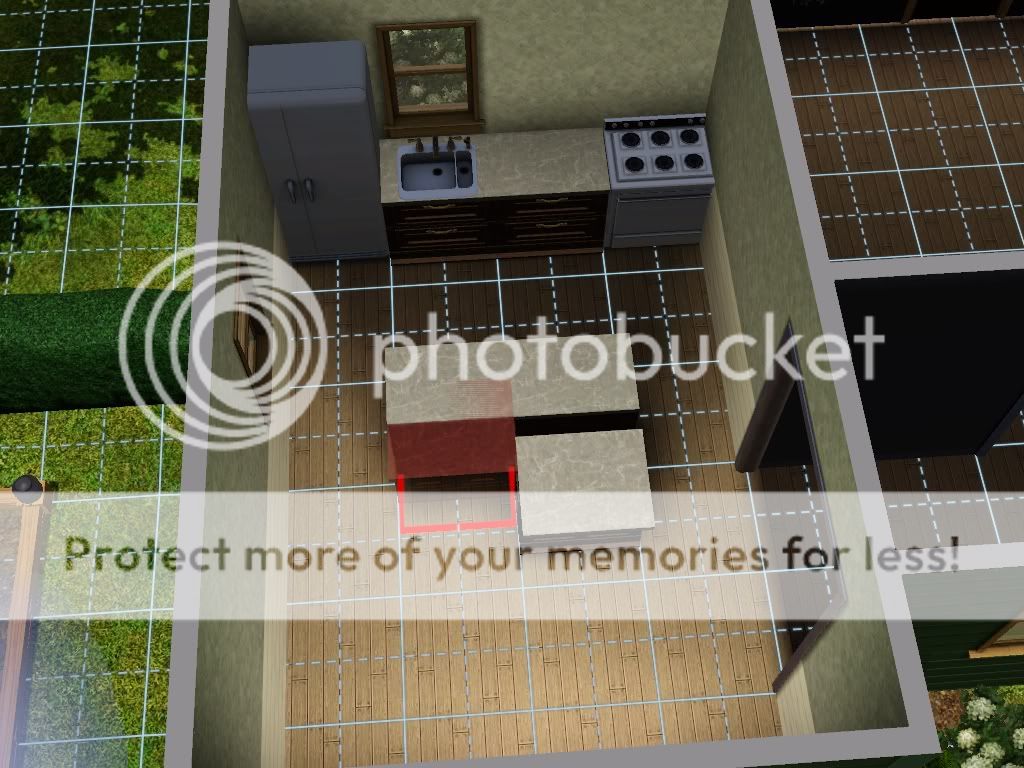
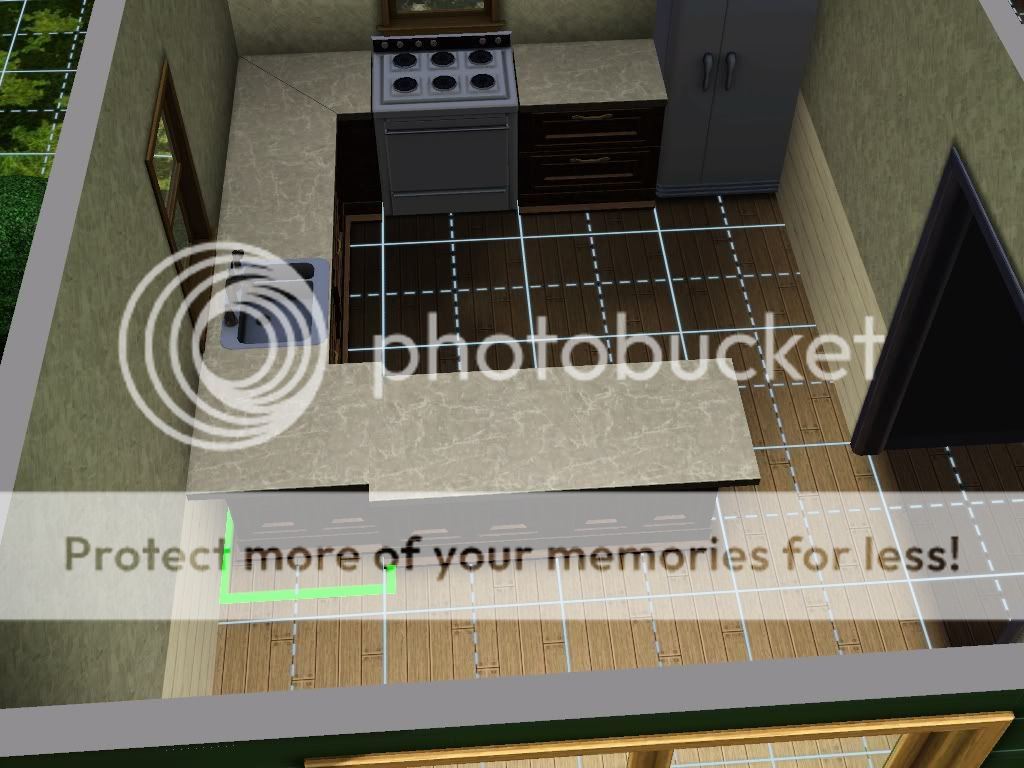
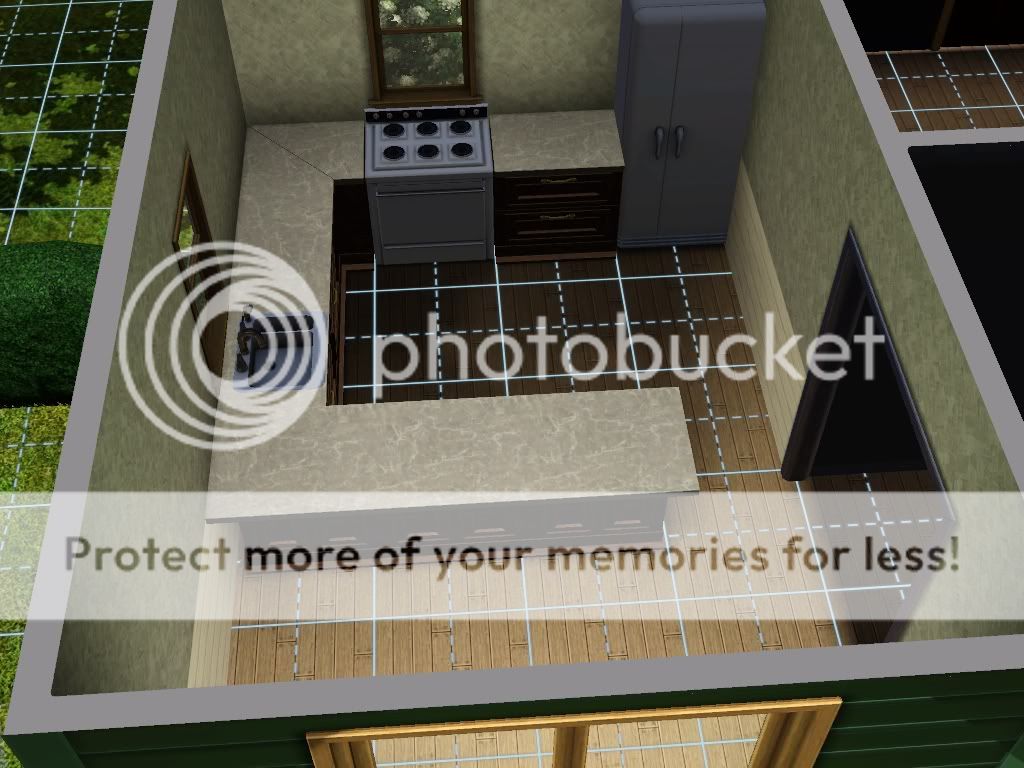
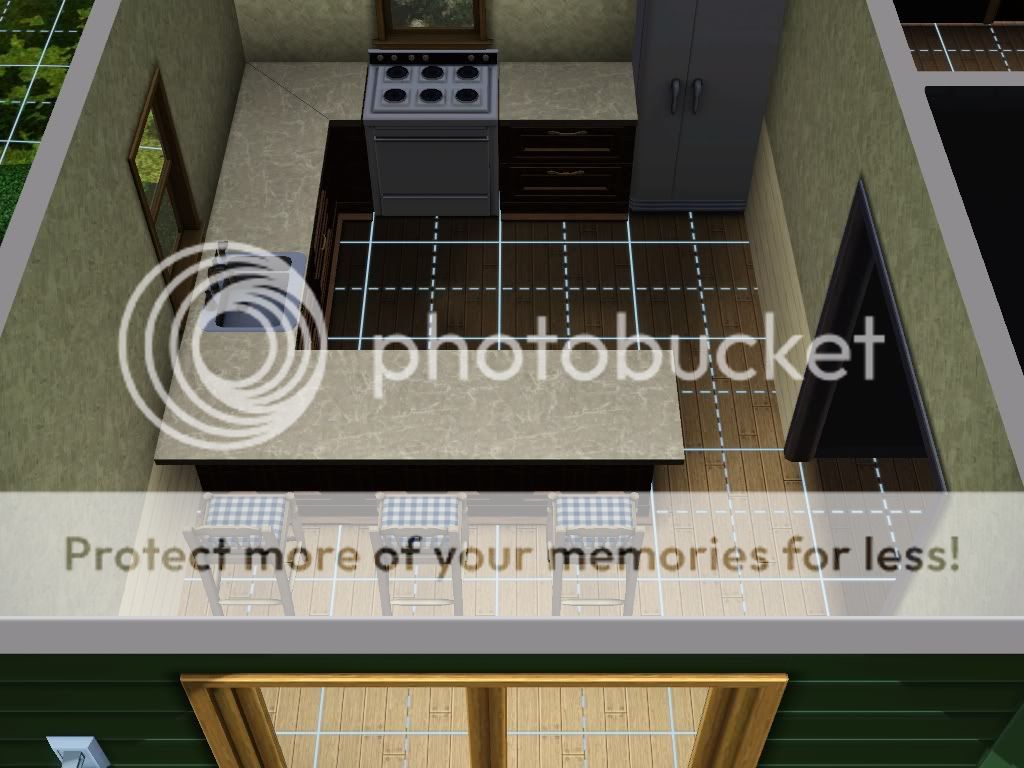
    kitchen - 5x4 or try galley kitchens. Usually incorporates eating area

    Small family home (family of 4)
    livingroom - 6x5 - 7x6
    bedroom (main) - 5x5 to 6x6
    second bedroom - 4x4 or 4x5
    bathroom - 3x3 for ensuites and 3x4 for master bathroom
    kitchen - 5x5 to 6x10 depending on design
    dining room - 5x5 to 5x7
    study - 4x4 to 5x5

    large family home (family of 6)
    livingroom - 6x5 - 7x6
    bedroom (main) - 5x5 to 6x6
    second bedroom - 4x4 or 4x5
    bathroom - 3x3 for ensuites and 3x4 for master bathroom
    kitchen - 7x7 to 6x10 depending on design
    dining room - 5x5 to 5x7
    study - 4x4 to 5x5

    There are some rooms that get bigger as the house gets bigger, but don't forget that just because you are building a huge house doesn't mean the rooms follow the same pattern. Keep them manageable. If you can fit 2 full sets of the furniture you want to place in that room then it’s too large. It will be overwhelming to decorate and not optimized for playing.

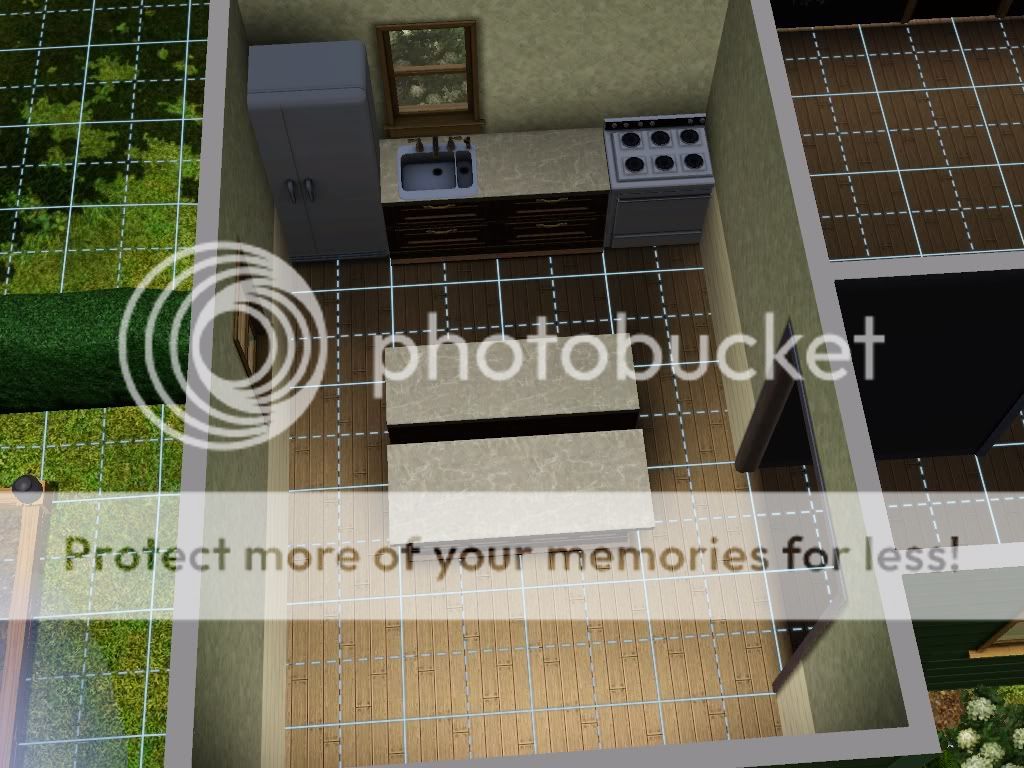
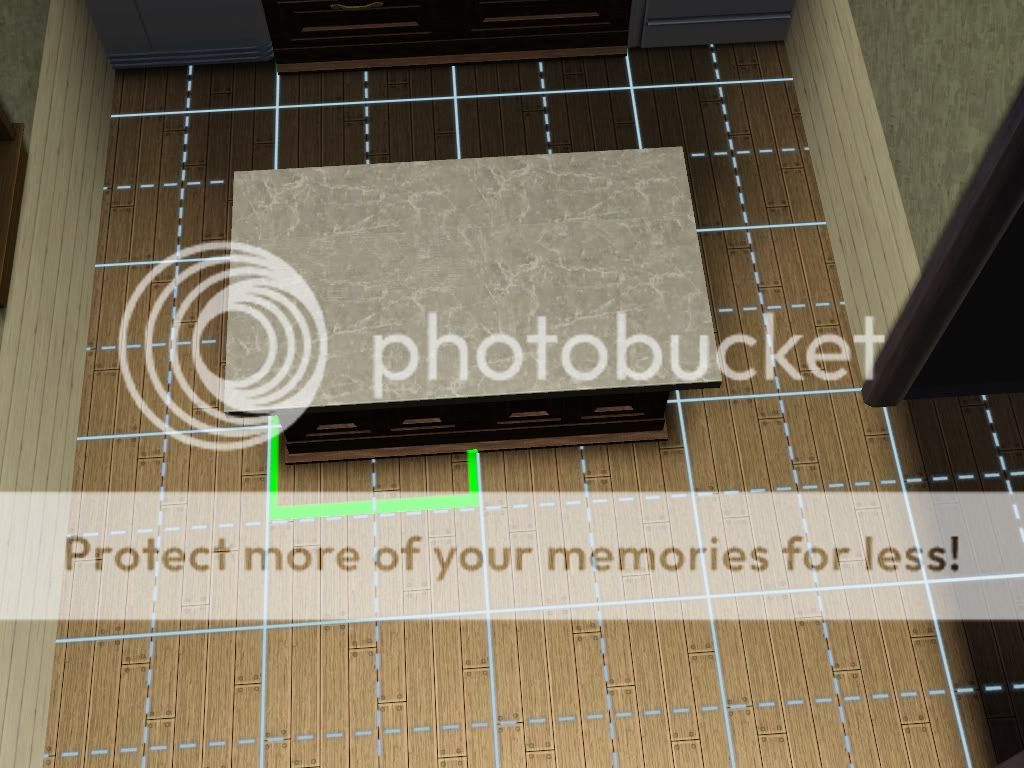
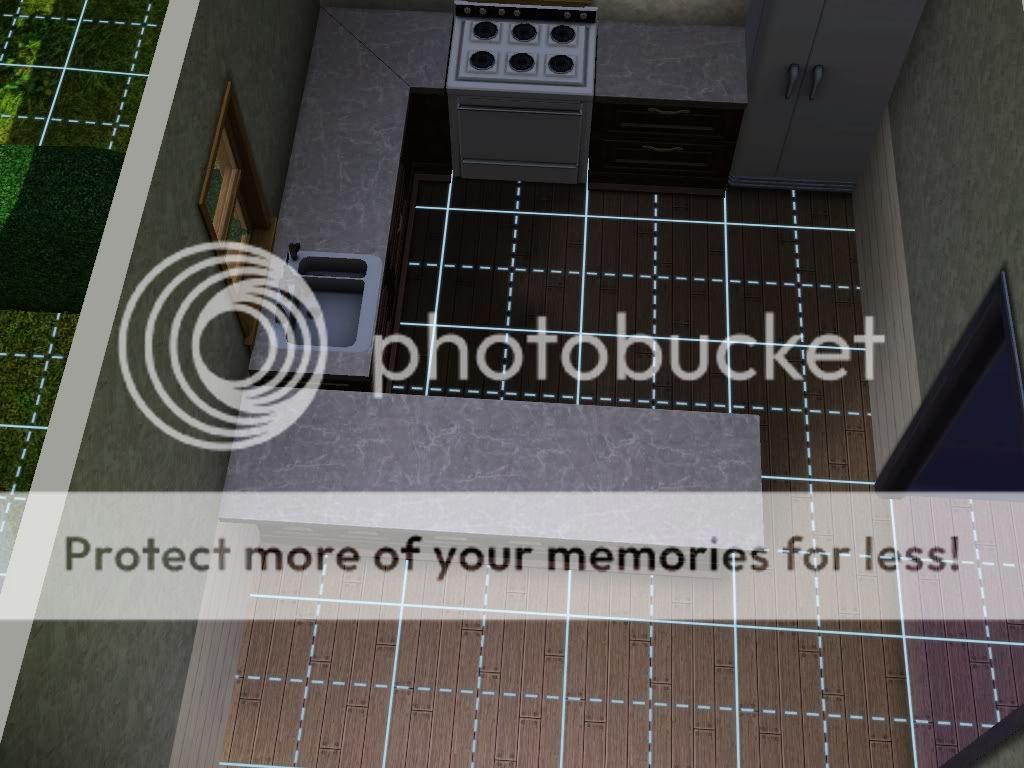
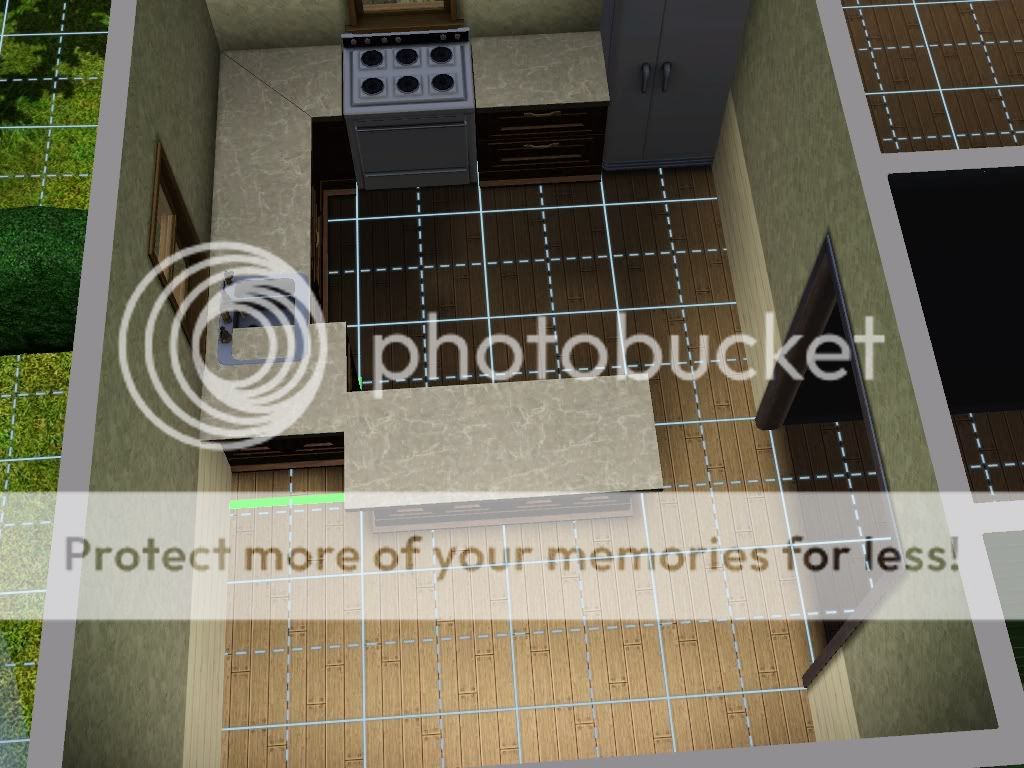
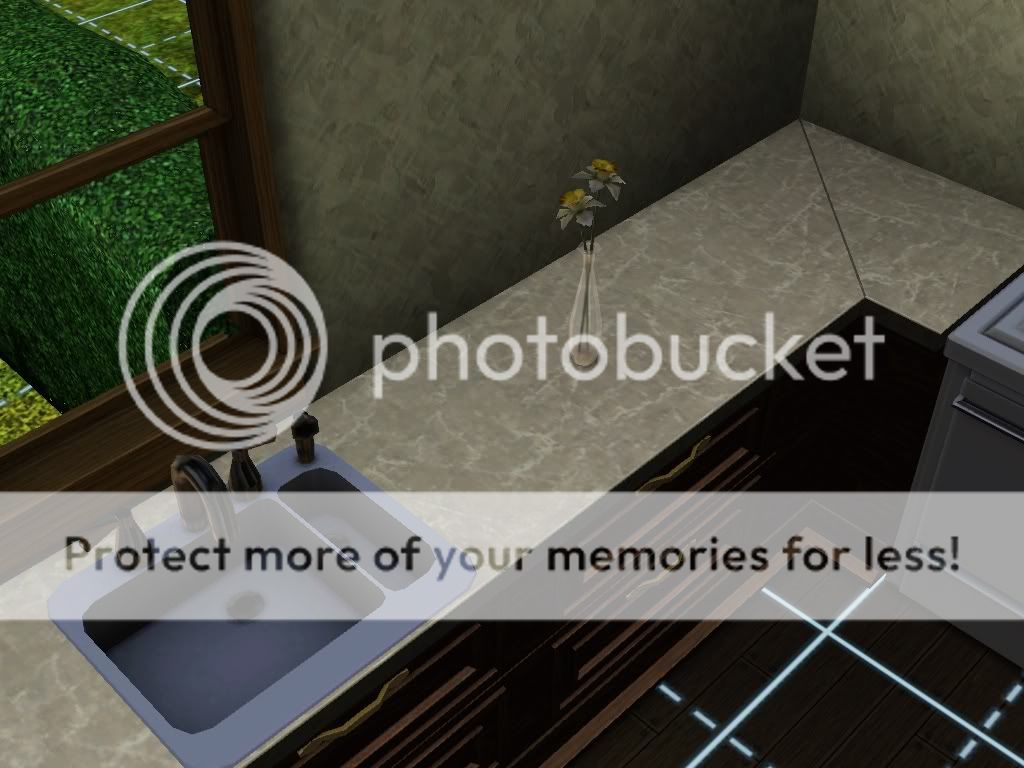
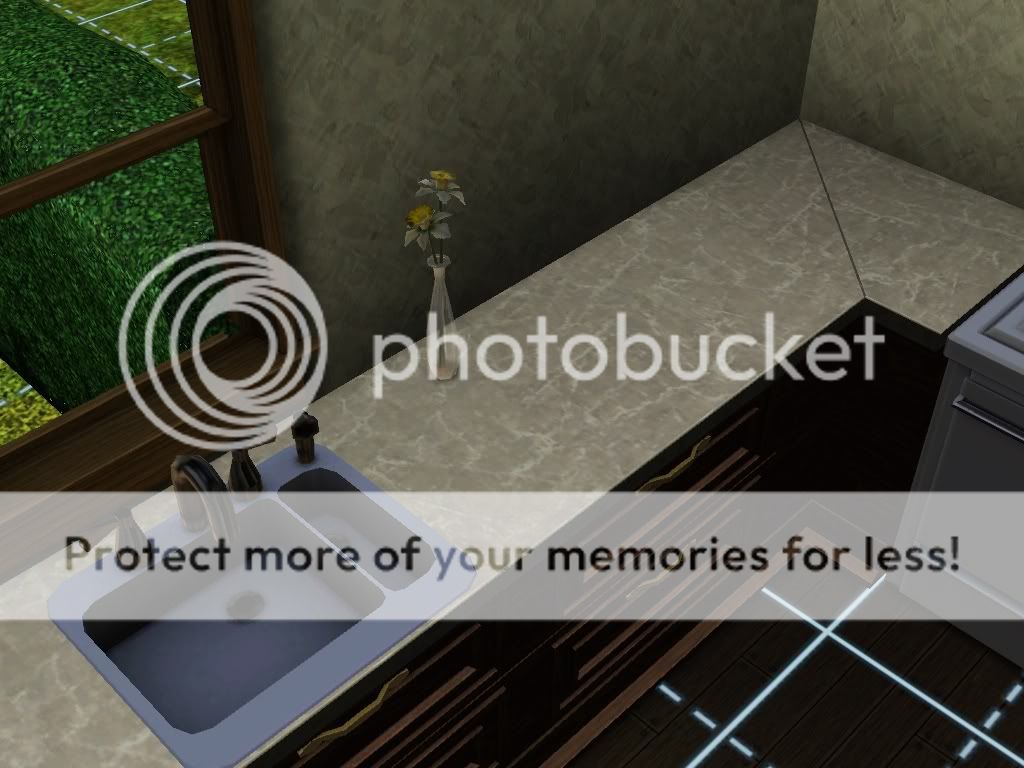
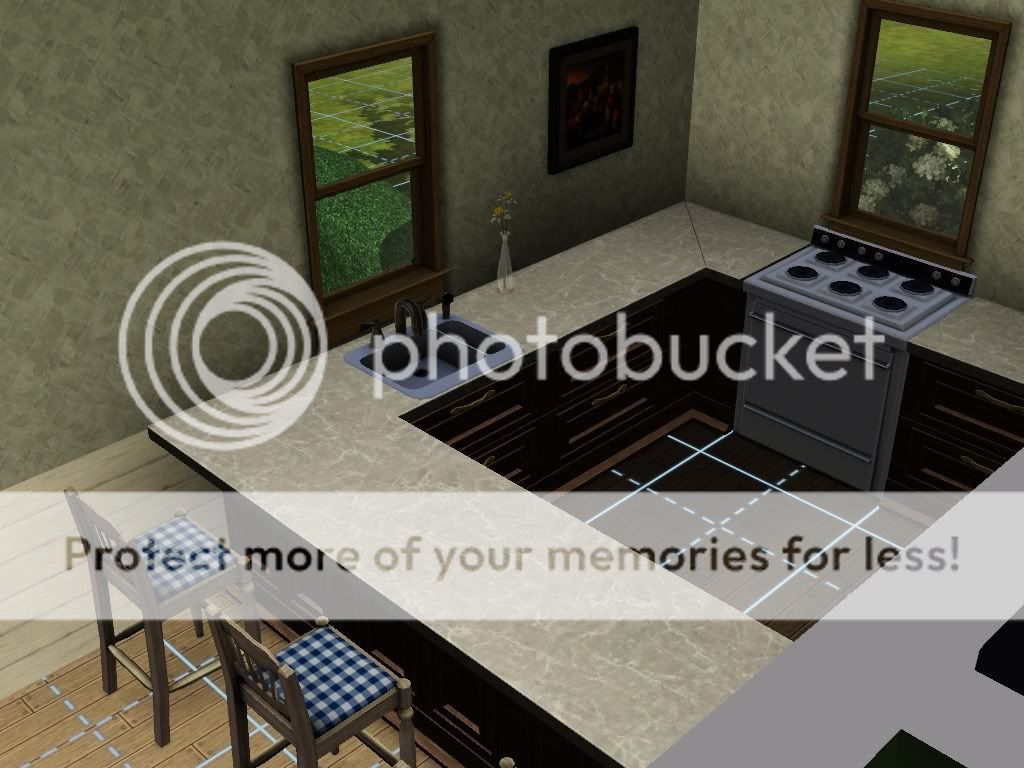
    Now you should have an idea of space that you need. Think about the sim you’re creating the house for and consider what you need in each room. You'll want seating and entertainment in the living room and maybe a skill item (an easel for artistic sims, desk and computer for writers). In the kitchen, make sure you have at least one counter free of any objects for your sims to prepare meals.

    Feel free to place furniture while you build, this will help keep your rooms from becoming overly spacious and you can adjust the room size to accommodate any skill items that your sims need. A little extra space is good to have, especially in places like hallways where one tile spaces can cause foot stomping.

    Building Basics ~ Lessons for Beginning Builders  210


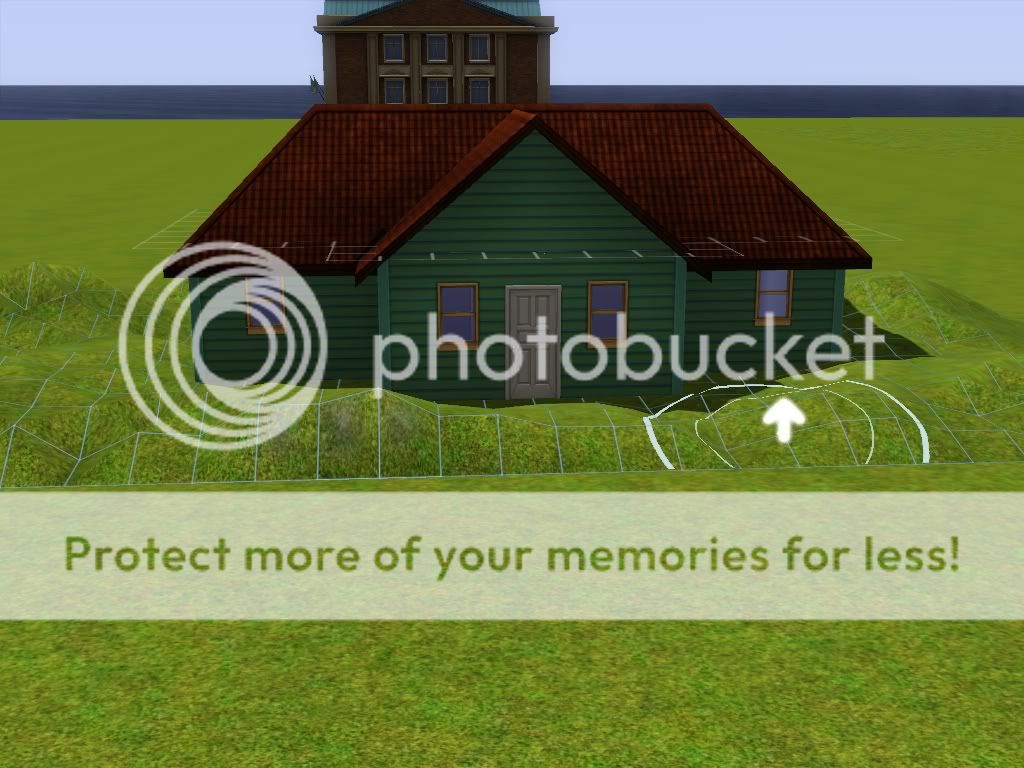
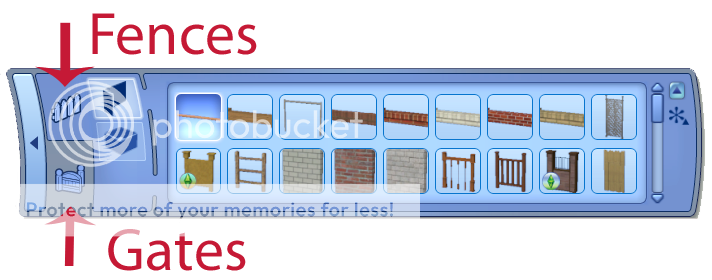
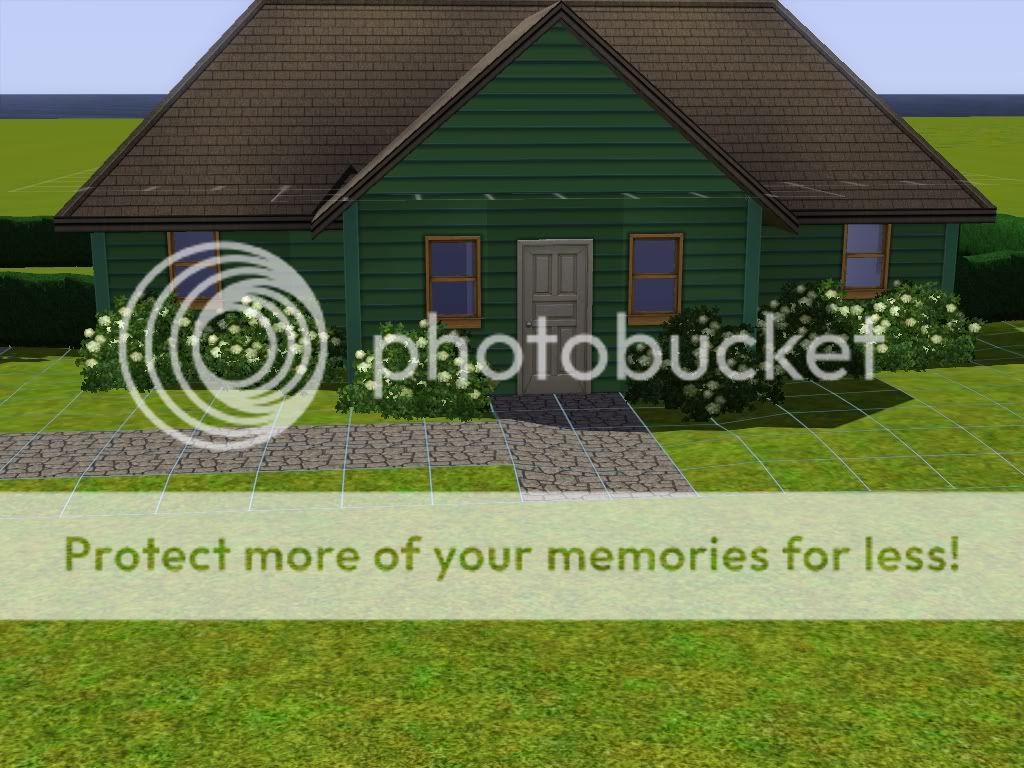
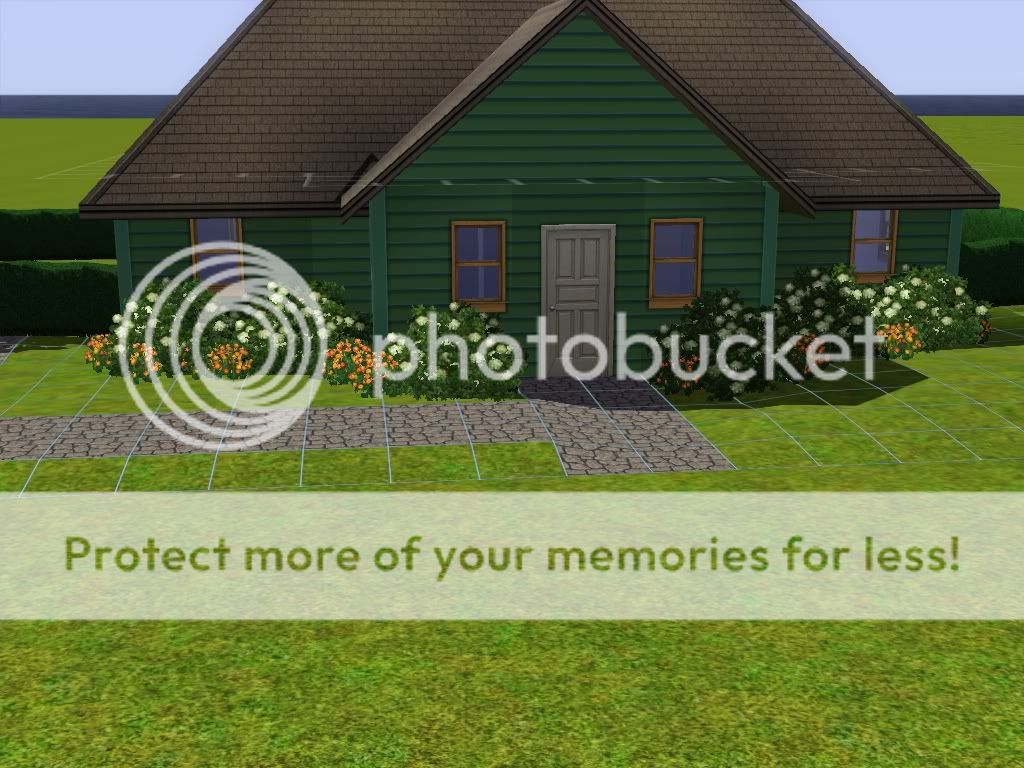
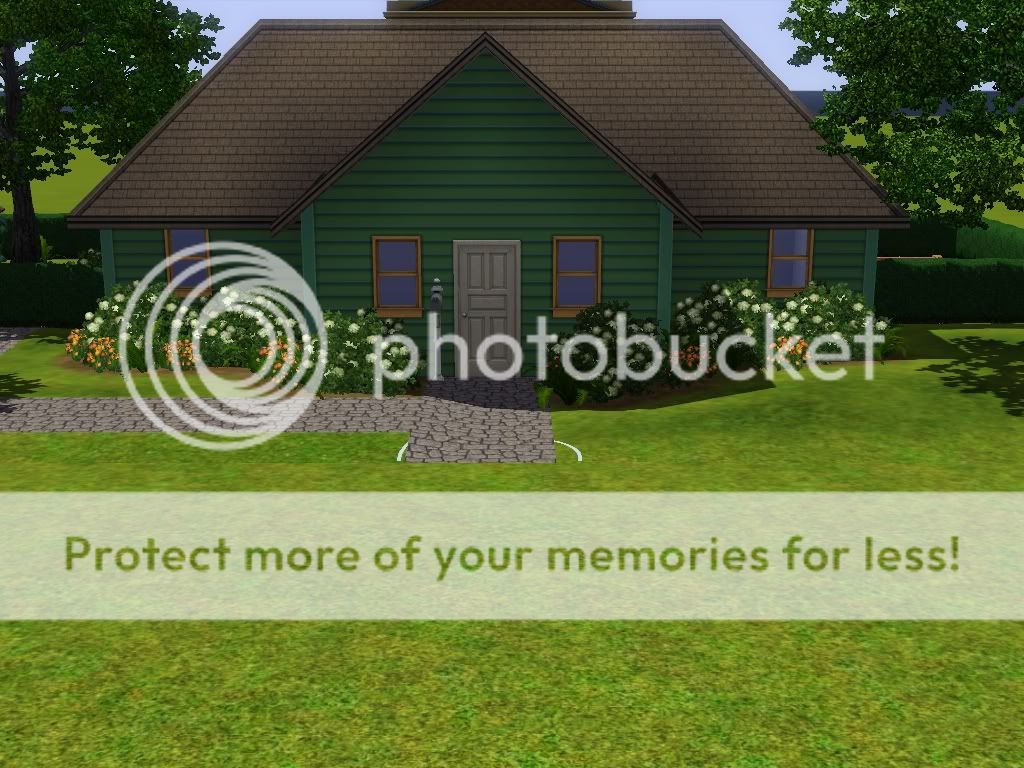
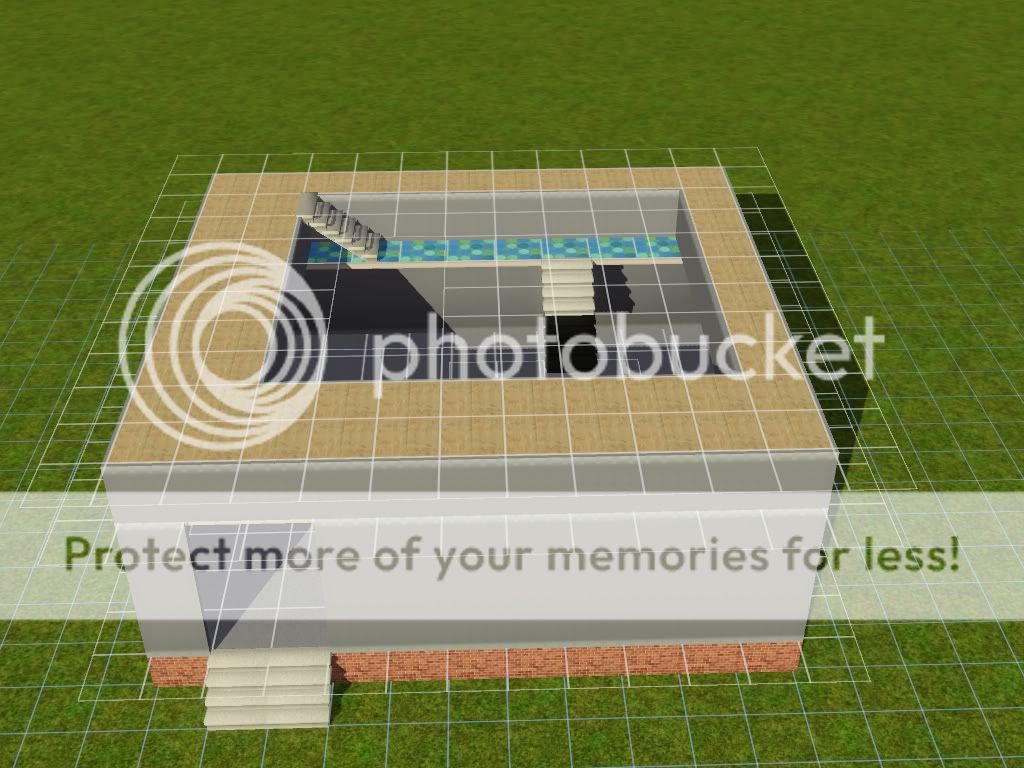
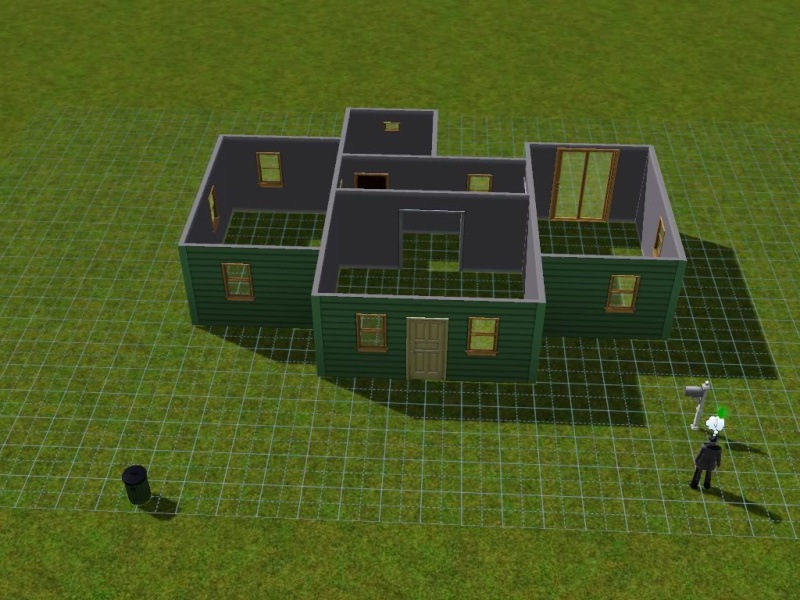
    You and place windows and doors (you can even use archways) now, or wait until after you have applied your siding. You do need to think about your furniture layout when placing them. Make sure each room has plenty of natural light (from windows), but make sure you leave room for wall art too. You’ll want placement of these items to be symmetrical. It doesn’t have to be perfectly symmetrical, just well balanced. Placing your windows from the outside can help you achieve this look. Use only windows and doors that are of similar style. Different styles will clash, and don’t use a bunch of different windows and doors even if they are similar. The best rule of thumb is less is more! Avoid placing either in corners, and make sure you don’t place your door where you could potentially have routing problems.

    Building Basics ~ Lessons for Beginning Builders  310


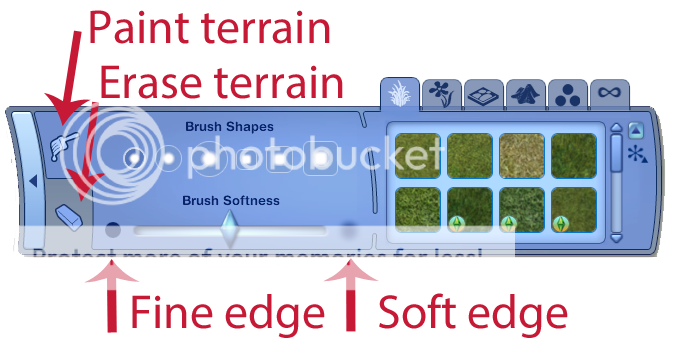
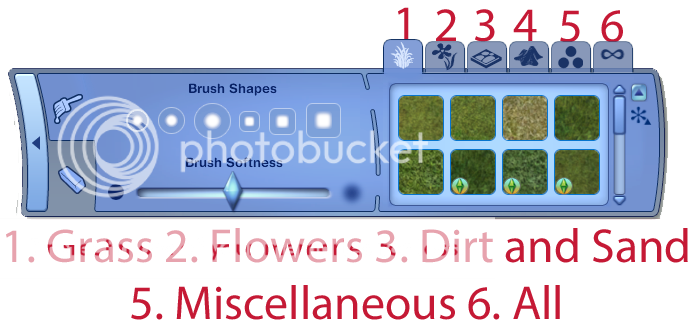
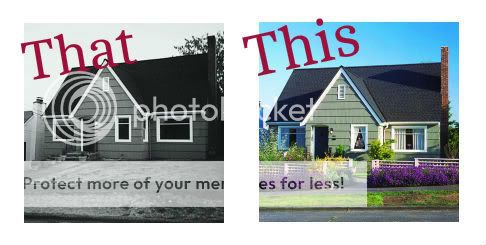
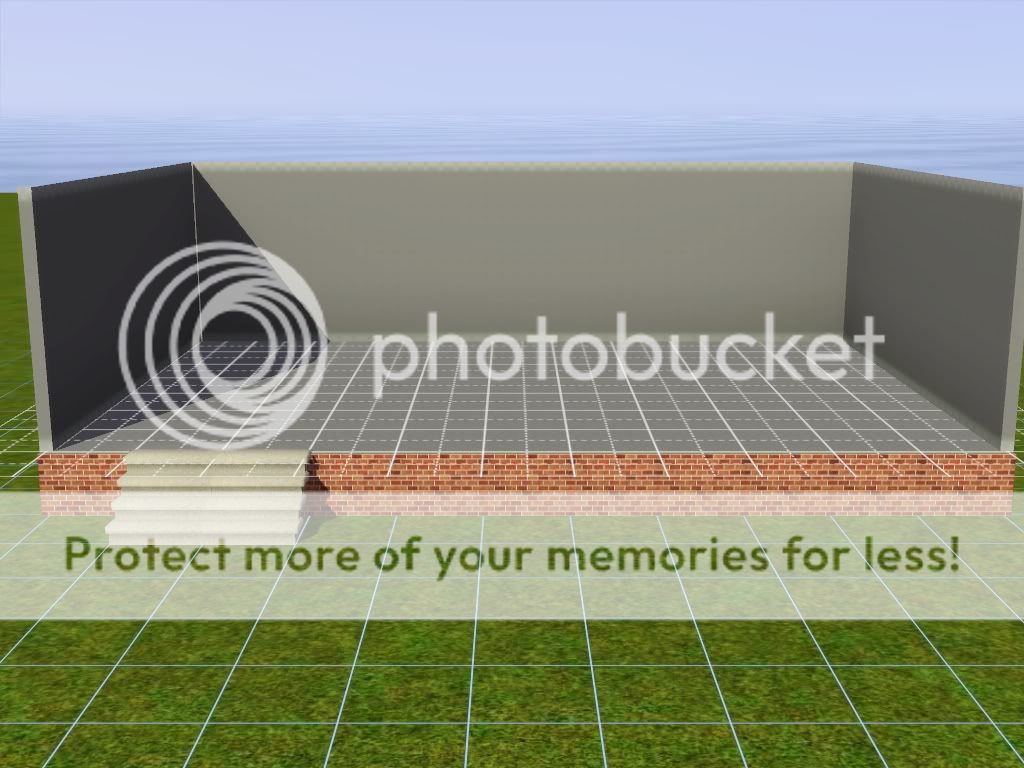
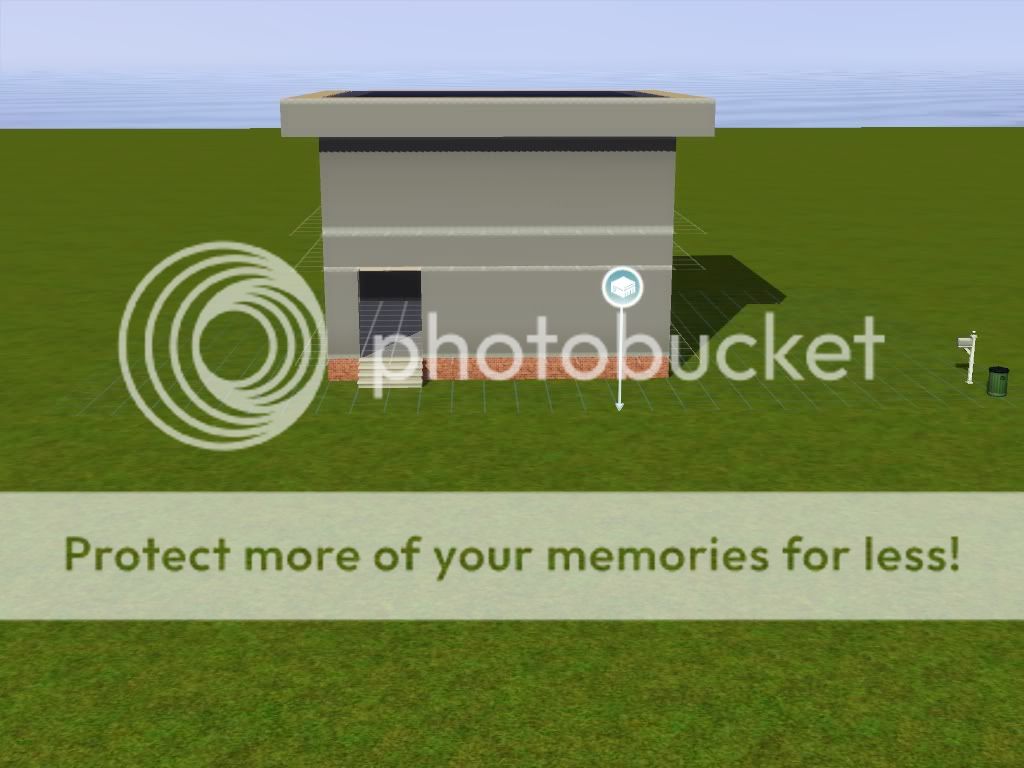
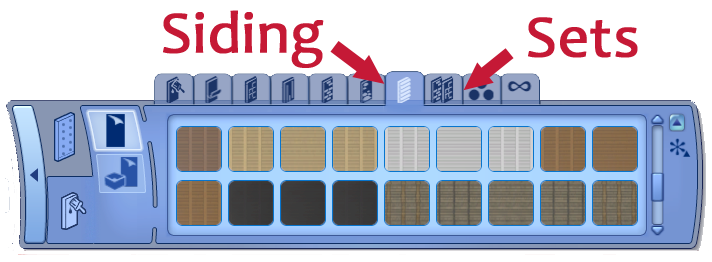
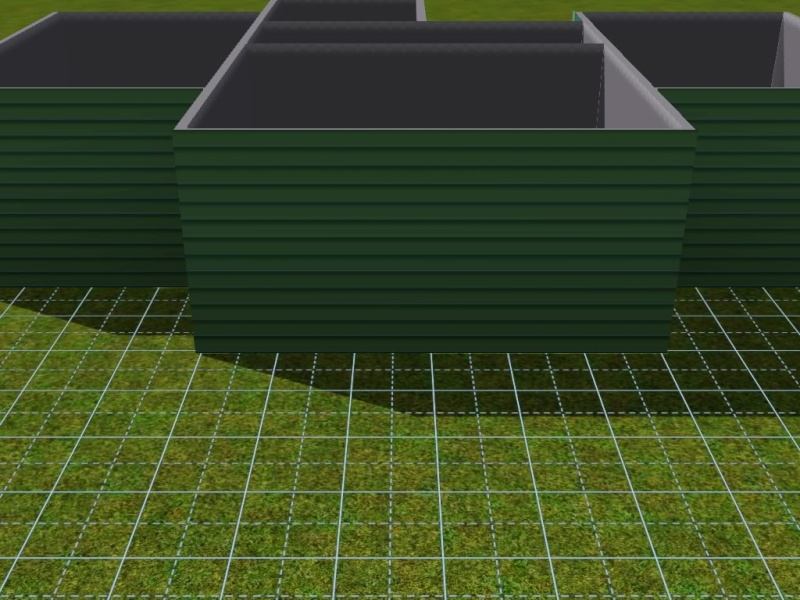
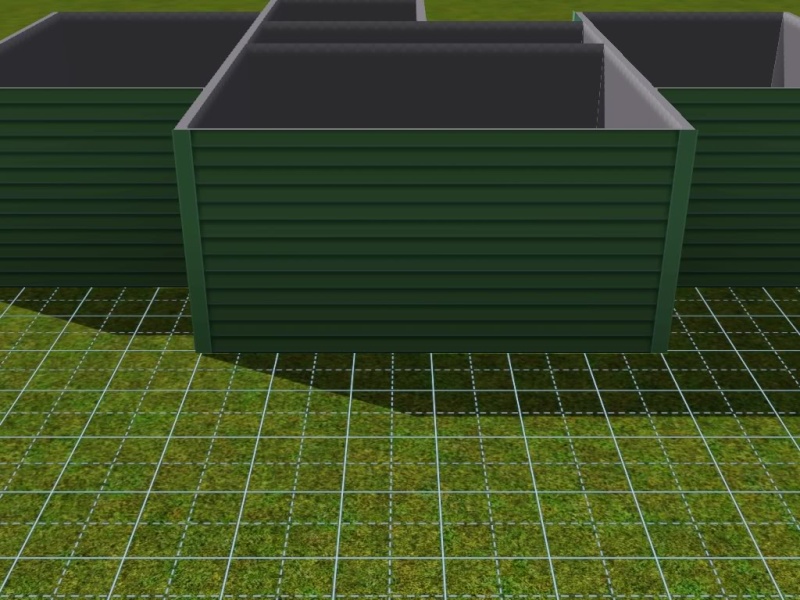
    Next up is choosing your siding! Siding can be found in several places in the wall paper tab, but we're going to use the simplest. Under the wall paper tab, you will find several options. Under sets and siding, you have sets of wallpapers that when combined give a more realistic, detailed appearance. Pick a wall covering that has a right and left detail. Place the detail edges on the outer corners of the house. This will give your exterior much more interest than it would have with just the siding.

    Building Basics ~ Lessons for Beginning Builders  410


    Without detailed edging

    Building Basics ~ Lessons for Beginning Builders  510


    With detailed edging

    Building Basics ~ Lessons for Beginning Builders  610


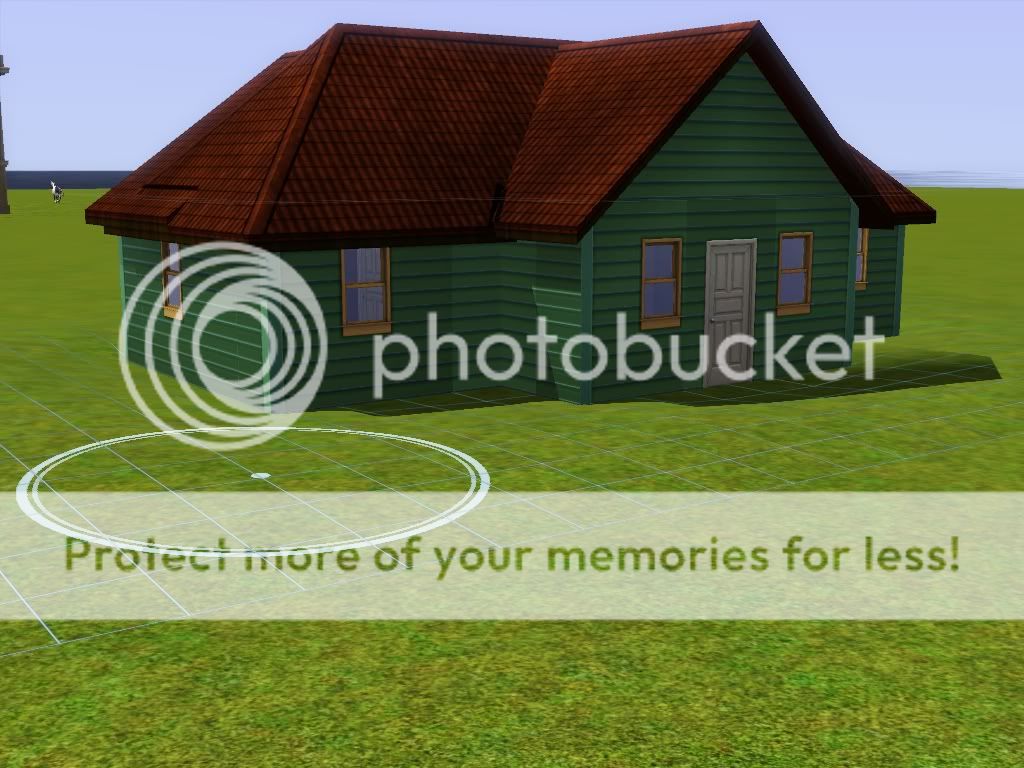
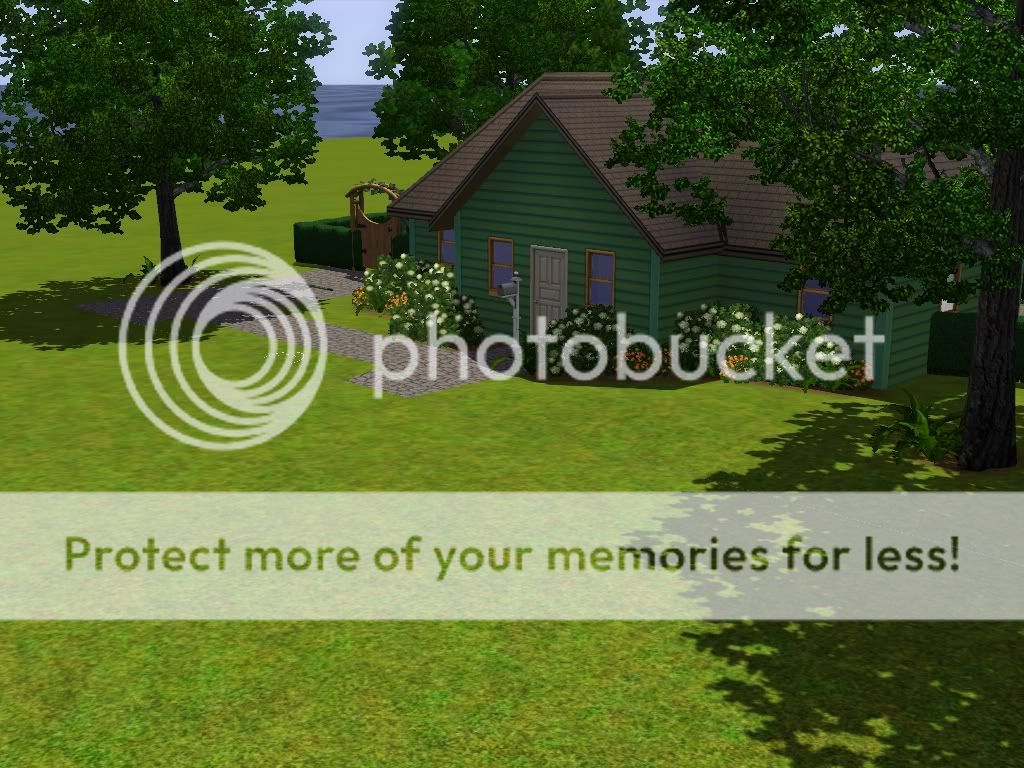
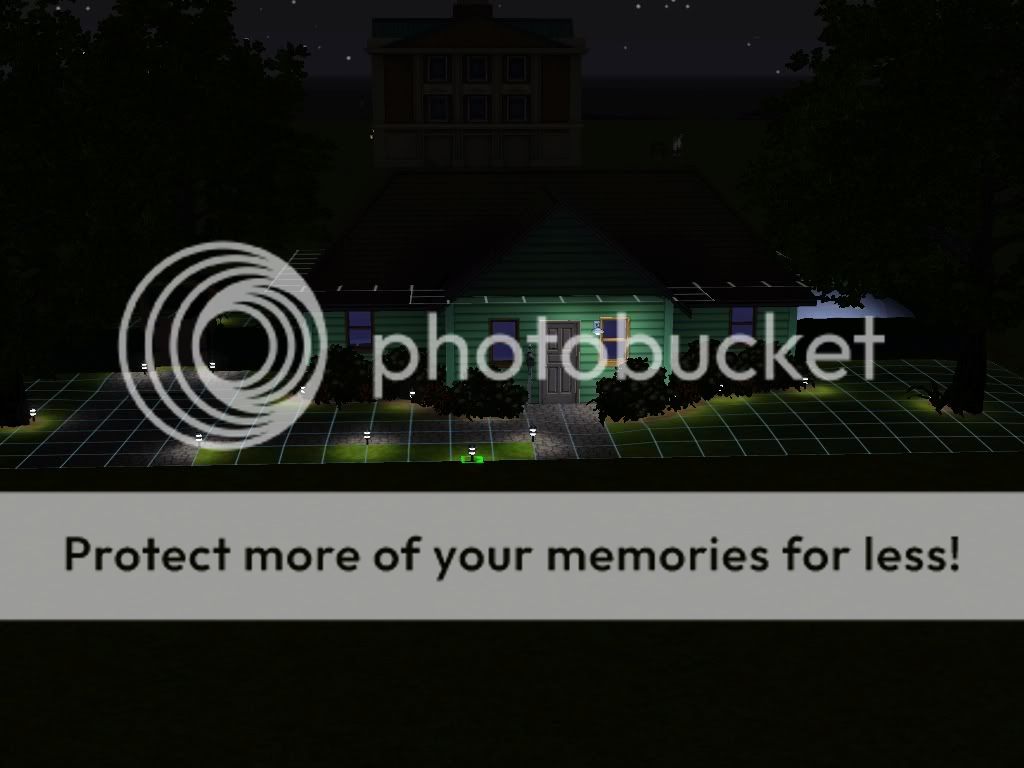
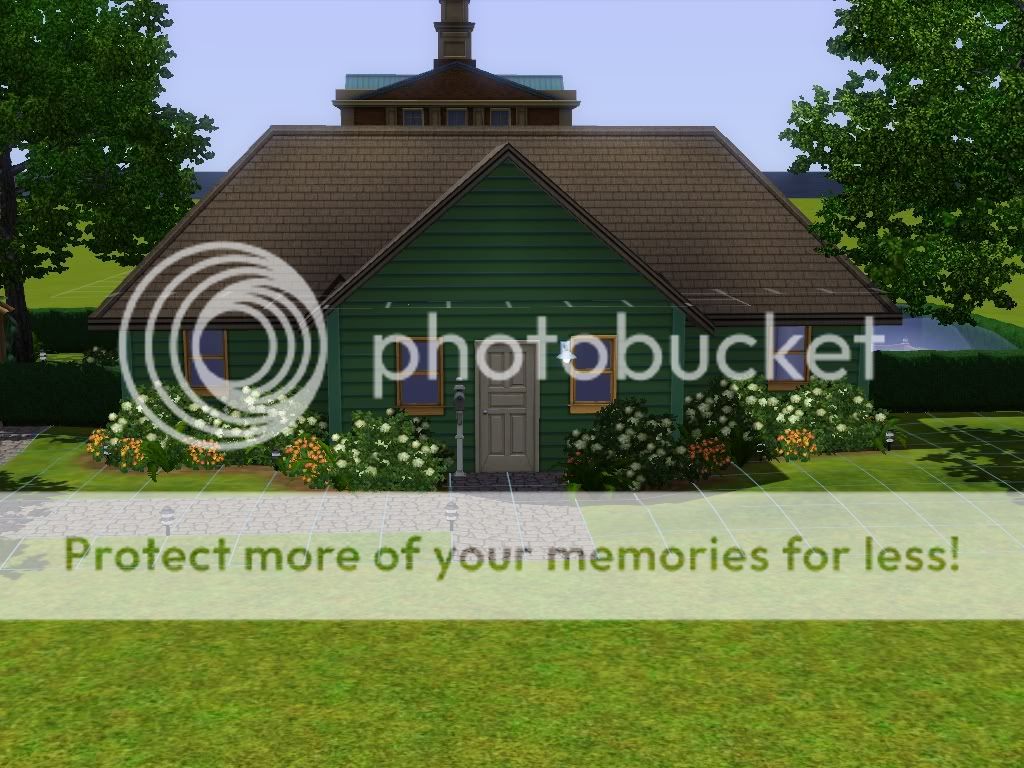
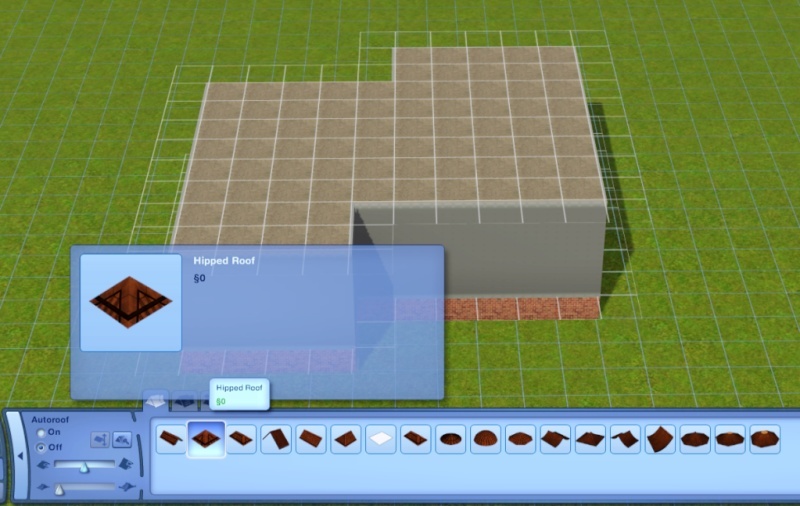
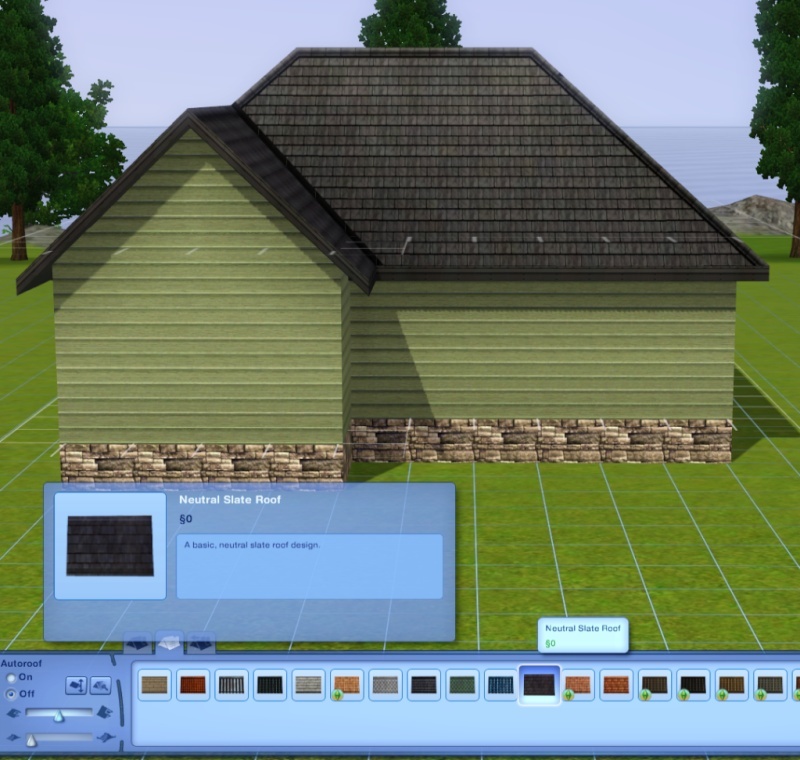
    Placing your own roof is very easy and is much better than letting the game place a roof for you. First rule in Sims 3 roofing: Never use autoroof -- unless you just want to see it for the amusement factor. Sometimes, they will actually look pretty good, but in most cases, it is best to add your own roof. So first, turn off autoroofs, and then remove all roofs. You may find it helpful to tilt your view so your looking straight down on the house.

    Building Basics ~ Lessons for Beginning Builders  7_flat10


    Once you have added this, consider the style of home you are building. The different roof styles will give different feels. For a basic ranch, you may want to use a full gable or full hipped roof. A modern roof will often be flat or asymmetrical.

    Building Basics ~ Lessons for Beginning Builders  8_hipp10

    Building Basics ~ Lessons for Beginning Builders  9_roof10


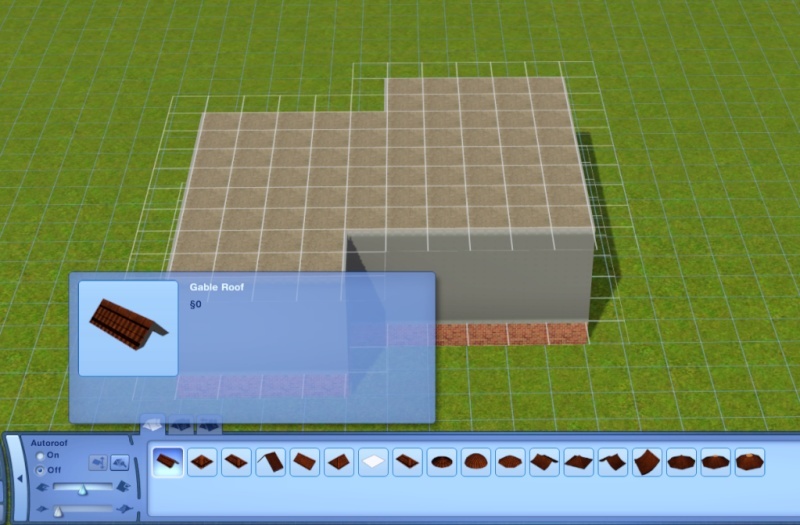
    Once you have selected your roof style, go up to the highest level of your home. Look at the shape from overhead. There will generally be one section that is larger than the others. Use your roof tool and drag all the way across the largest section, from one side to the other, covering that section front to back.

    Building Basics ~ Lessons for Beginning Builders  10_ove10

    Building Basics ~ Lessons for Beginning Builders  11_fir10


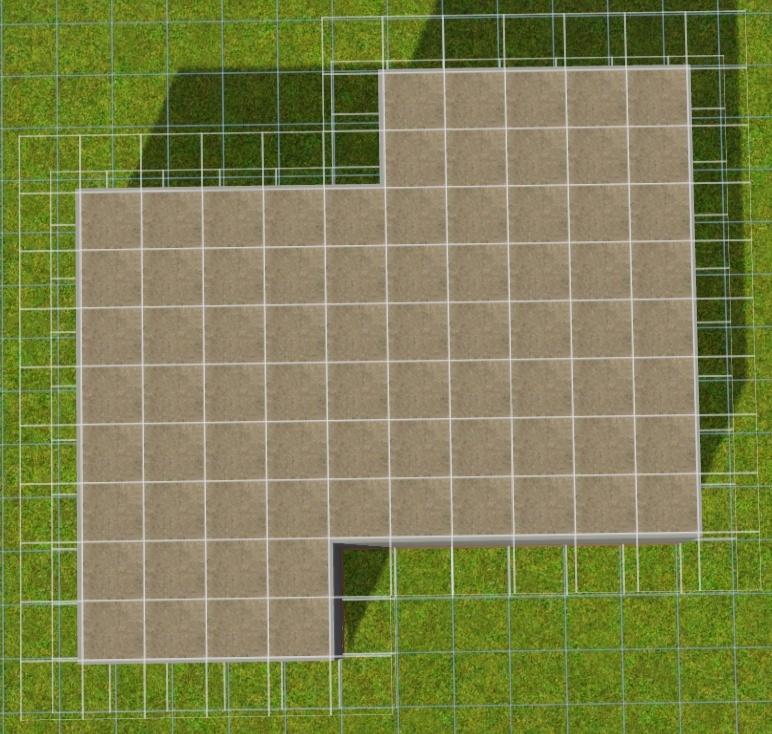
    It’s okay if the smaller sections aren’t covered yet, they get their own roof. Now, do the same for each smaller section, only add these roofs at a 90 degree angle to the larger section. You should drag them all the way into the larger roof section until the back edge does not show at all. Once you are finished, check to be sure you have covered the entire house.

    Building Basics ~ Lessons for Beginning Builders  12_sec10


    Building Basics ~ Lessons for Beginning Builders  13_thi11


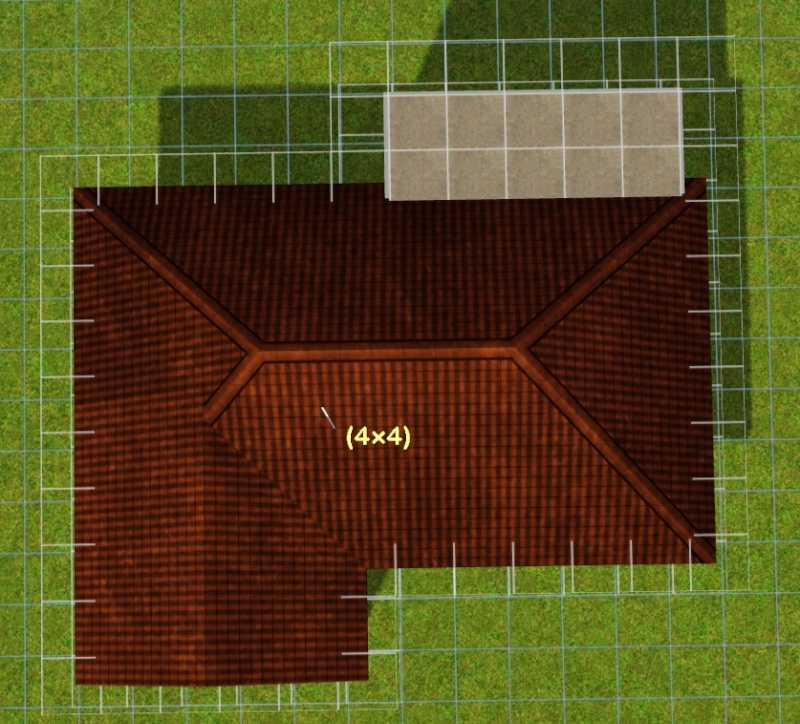
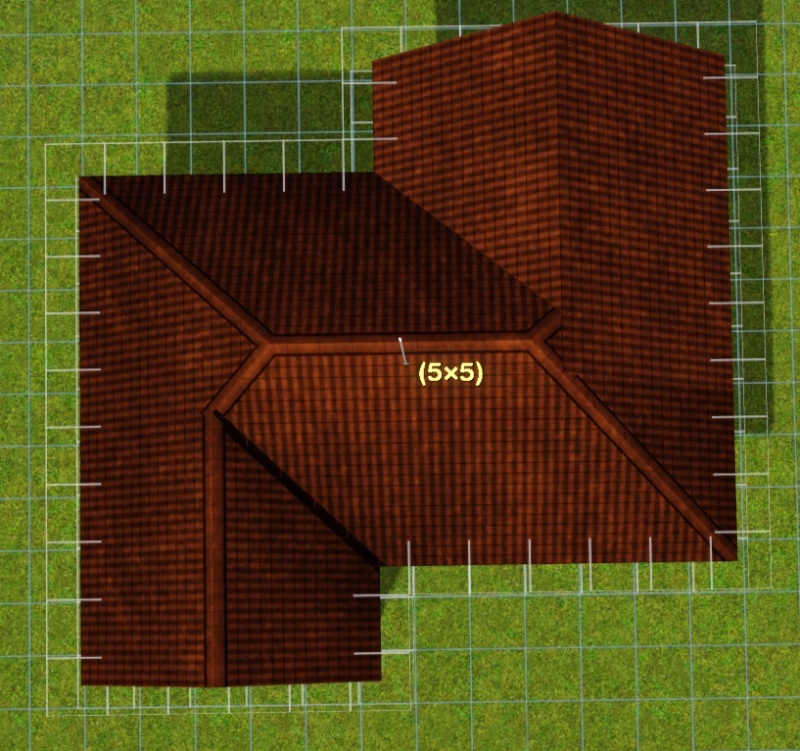
    Make sure there are no “valleys” in your roof. Think of what would happen if it rained. You don’t want there to be anywhere that the rain would run together and cause leaks. It should all run right off the roof.

    Building Basics ~ Lessons for Beginning Builders  14_nov10


    When you have a roof style and shape you are happy with, you are ready to choose a color. Go through every color we have, because sometimes you’ll find one that you wouldn’t have thought of for that home. It should complement your siding color, and not blend in too much. Consider if the color overpowers the home, or adds to the appeal.

    Building Basics ~ Lessons for Beginning Builders  15_roo10


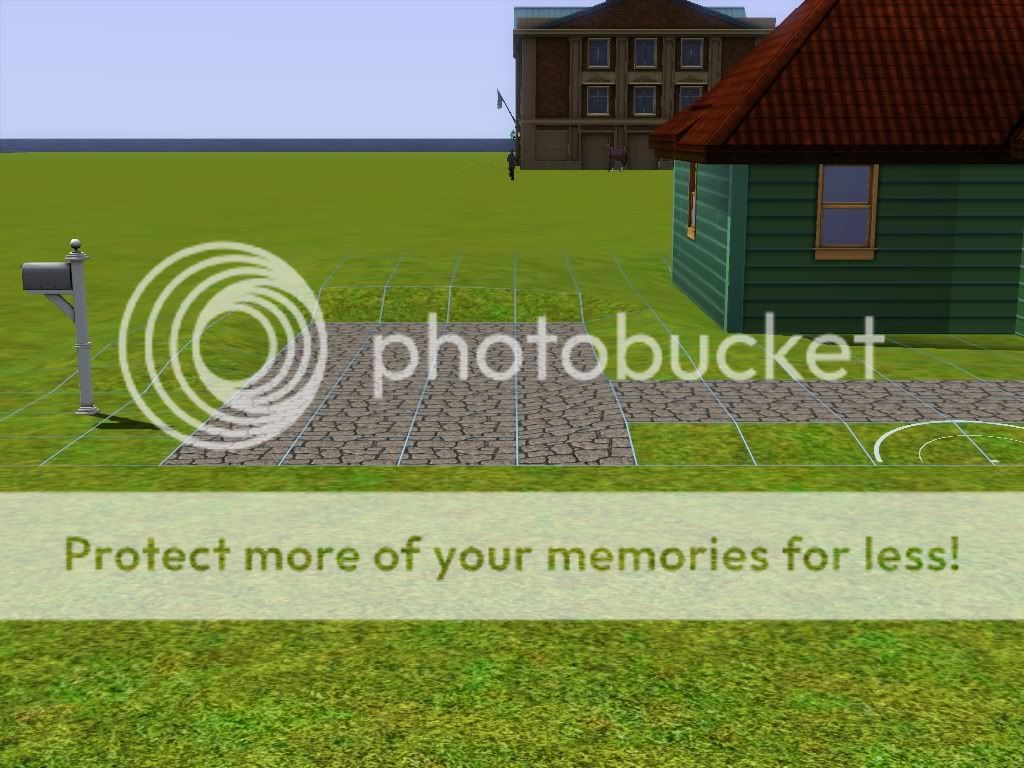
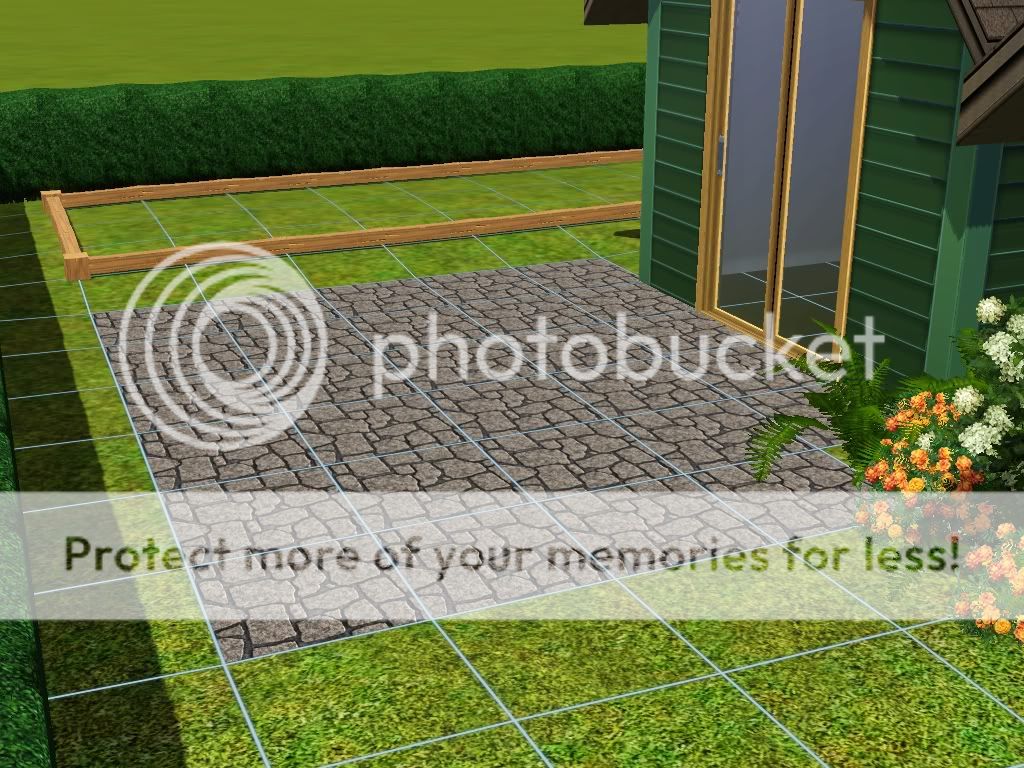
    Do not decorate your interiors or do any landscaping just yet, as this lot will be needed for future lessons.
    Archivist
    Archivist


    Posts : 220
    Join date : 2010-12-04

    Building Basics ~ Lessons for Beginning Builders  Empty Re: Building Basics ~ Lessons for Beginning Builders

    Post  Archivist Mon Sep 22, 2014 10:53 pm

    Lesson 2 - Interiors

    Welcome to your next lesson. In the following we will discuss...
    ~Colors
    ~Patterns
    ~Furniture placement
    ~Wall and floor treatments
    ~Clutter
    ~CASing
    and
    ~Lighting

    Let's get started.

    Now that you have a build that is not a box, how are you going to fill the space? Hopefully while building, you had an idea about where you wanted things to go. Sometimes people are unaware and do not know where to begin. With this lesson, we will cure that.
    Building Basics ~ Lessons for Beginning Builders  Screenshot
    First, let's put a floor in the build. Go to the roofing section in build mode and select roof tile. Place on the interior of home and shift click. It will fill the entire space of one room. Now do it for the others.
    Building Basics ~ Lessons for Beginning Builders  Screenshot-2

    Color -
    There are many options that you can choose from as far as color. The easiest route would be to create a color palette or choose an already made one. The site, Colourlovers has thousands to pick from. Here is a link. http://www.colourlovers.com/ You may want to bookmark it and create an account for future reference. Although a color palette is not needed, it is a good starting off point. Do spend some time thinking about the colors you want to use. Colors can make or break a build. Too many and your main colors can get lost. Too little your build may look a bit monotone and bland. A nice balance would be three colors plus an accent or two. Depending on what you are trying to accomplish and your style of build, whether it is modern or traditional, your colors ought to reflect that. Modern build usually have a few colors and nothing too over the top. Traditional will use neutral tones with maybe a bit bolder accents. You may consider looking to real life and use colors according to that. It takes time to get it right with color, always remember if you need assistance, do ask in Help for Beginning Builders thread.
    Here is the color palette I chose and the hex codes.
    Building Basics ~ Lessons for Beginning Builders  Boatshoes

    Building Basics ~ Lessons for Beginning Builders  Boatshoes2

    Patterns -
    Patterns can be hit or miss. Like color, if you have too many it can get out of control. Too little and it becomes lackluster. EA does provide us with a variety to choose from. And the beauty is, even the ugly ones can be aesthetically pleasing with the right tweaking. Don't be afraid to use patterns. Just ensure that your choices are appropriate for the style. You wouldn't use a damask pattern in a modern, usually, and some of the abstracts would just be wrong for traditional. Of course, there are always exceptions to the rule. Textures include paints, fabric and wood while bold patterns would be geometric, abstract and themed. Best bet is to use max one geometric with one floral per room and use textures for the rest. Use your judgment. Also, be sure your patterns do not clash. If you have a certain pattern on the wall, you want to make sure what you choose for the sofa works with it, not against. Do not be afraid to experiment as well. Like this guy.
    Building Basics ~ Lessons for Beginning Builders  2m8BXUfri902rxz0qd5l1QCo_400

    Furniture Placement -
    This can be daunting as there is a lot to think about. Some people are lucky though, they just plop things down and they work. Others spend much time debating over placement. Do not over think it and if you find yourself stuck, ask for help! To have a good layout, you want to first and foremost allow for proper routing. Make sure your sims can navigate freely through and traffic is not an issue. A lot to think about here. Also, there is selecting appropriate furnishings. Consider once again the style you are building and select furniture according to that. Don't use regal furnishings in an ultra modern. Also, be sure to include skill builders. Think of the sims that will be living in the space. Are they artistic? Get them an easel. A genius? Provide a chess table and/or telescope. Make sure your layout is inviting. Also think of your showcase pictures. Can you get a good view while snapping? A good thing to do for inspiration is to Google images. If you are doing a traditional, Google traditional interiors and browse the images. Don't worry about copying something. Sometimes it's a good starting off point. Later as you develop, so will your skills and individual style. Room to room, make sure your layout is cohesive. It ought to blend and not be awkward. Rooms should compliment one another. Pick a starting point, for picture purposes we will start off with the living space. Our build is a starter of more the traditional route. If you notice, there is a space between the front door and archway. We will need to keep this relatively clear for routing.

    Here is the basic layout of the living space. Doesn't look like much right now, but once the space is filled in with wall treatments, flooring, clutter and lights, you will see a big difference.
    Building Basics ~ Lessons for Beginning Builders  Screenshot-3

    Wall and Floor Treatment -
    This part can be really fun because this is what ties it all together. Retrieve your palette, if you are working with one. Now, you want to work with colors and patterns for the walls and flooring. We will discuss walls first. As mentioned, consider your style...there are ample choices in the wall menu in build mode, but you can also do a bit with Create A Style, or CAS. We will talk about CAS later as we go, but as for now, remember the pattern rule? One bold pattern with a flowery one, depending on your style, and the rest textures. Decide here if you are going to use a pattern on the sofa in the living room. If so, you may want to use a texture for the wall treatment. Or vice versa. Less is more, once again. Now, decide on what style of wall treatment you want in Build Mode. There are many choices from paint to wall sets. Your style will influence what you choose. Once you have selected your wall treatment, it's time to CAS it. This goes back to patterns...as mentioned earlier. Be sure to use the appropriate one.
    As you can see here, I went with the wall with dado which is the first wall in paints. I placed one section, which I will CAS before covering the wall.
    Building Basics ~ Lessons for Beginning Builders  Walltreat

    After I CAS the wall, according to the yellow and white in our palette, I held shift and clicked to get the wall treatment all over the room. Already our room is looking more cheerful.
    Building Basics ~ Lessons for Beginning Builders  Caswall

    Floor treatments are fun as well. As always, what you choose depends on the style you are working with. Wood flooring is always attractive and there are nice options that are free. If you are working with a budget, that could be ideal. General rule is different flooring for living spaces and bedrooms, and kitchens and baths . You can have all the same, but it is more appealing to mix it up a bit. Flooring in baths and kitchens are usually tile. Again, consider patterns, textures and colors when designing your flooring. Instead of using a tile pattern from build mode, you are welcome to use any floor you want and CAS it. Also, you may want to experiment. The floor tiles can go in one direction or opposite directions as well. You can achieve custom flooring with not much effort if you just play around with it. More will come on that in later lessons.
    With the floors, I selected wood from the freebie section.
    Building Basics ~ Lessons for Beginning Builders  Floor
    Then CASed it the brown in our palette. It's really beginning to take shape.
    Building Basics ~ Lessons for Beginning Builders  Screenshot-4

    Clutter-
    Another fun part. Here is where you can make your build look like a home. You can score that lived-in look, or with less clutter, an unoccupied establishment. But...what is the rule? Less is more! Less is more! Less is more! I cannot emphasis that enough. A build can look tacky with too much clutter. Find your rhythm. EA does provide us with a good supply of clutter. And just a shopping trip away, great third party custom content can be found. There is a whole section of decor in Buy Mode. From plants to misc. decor.
    A good starting point is wall art. Do not clutter up every space on your wall with art. One painting per wall, given that it's a modest size, shall be sufficient. Also, choose appropriate wall art that suits your theme. Look to make sure the colors coordinate with your room as well. Wall art can be moved up and down the wall by holding down your left click. This is valuable as it adds to many dimensions of the space.
    As you see in the first pic, I added one pic to the two walls, but made sure the size, color and content of the wall art is appropriate for the room. I also adjusted the photographs on the right.
    Building Basics ~ Lessons for Beginning Builders  Screenshot-5
    The next pic I chose to leave out one wall with wall art because of the door and windows. To balance the opposite wall, I chose wall art that mimics the size of the other space.
    Building Basics ~ Lessons for Beginning Builders  Screenshot-6
    Next up is plants. Empty spaces on the floor just scream for plants...but not too many. Also, consider what else you will need to include in the spaces. You may have forgotten something while filling in the furniture. No more than 3 large plants per room on the floor, in a modest space, and assuming it's not a sunroom. Take breaks from working your space. Once you come back, have a look and if something doesn't feel right, take it out or replace it. This is not a science. All interior design is art. Creative art.
    Empty corners are great places for plants. Don't force them into position, let it be natural. In our room, there are limited places on the floor for plants, so a hanging plant is a good option.
    Building Basics ~ Lessons for Beginning Builders  Screenshot-9
    Let's talk about mirrors. Of course you want to place them around your sinks in bathrooms, above dressers in bedrooms, but they can also be used to enlarge a room that lacks many windows. In real life that is a decorating trick as well for small spaces. Depending on your style of design, you can also attach a curtain to a mirror and use it as a window. In the style of Feng Shui, mirrors are a great usage for energy. Mirrors are also a skill builder for charismatic sims.
    Curtains in real life have a dual purpose. One is aesthetics and the other is to block light, or let it in depending on your mood. In the sims, curtains are purely decorative. Curtains can be a nuisance at times as not all fit every window. So that must be taken into consideration as well as the style of your build. Curtains cannot be manipulated up and down the way wall art and some lights can. You must make due with how they hang, unless you want a mod for that. One can be found at Mod the Sims.
    The chosen curtains fit the window and adhere to out theme.
    Building Basics ~ Lessons for Beginning Builders  Screenshot-8
    Rugs are a great way to add balance and warmth to your room. There are not too many style and sizes to choose from, but with proper CASing, any rug can look like a million bucks. You can place a rug straight a ways or angle it for a bit of drama. CASing is important as well, and once again we go back to the pattern rule of one bold with one flowery pattern in your room, so keep in mind which are which and use textures for the remaining. A great idea is to go by your wall color and use that in the rug for the bigger part. Your accent colors could anchor the rug around the border. Make sure your border and main part work together and not against each other. Your rug design ought to compliment the room and tie it together.
    In our room, I added 2 rugs to each sub area of the room. The rugs should balance and define the sections. They may look out of place for the moment, but once we CAS them, they will take shape.
    Building Basics ~ Lessons for Beginning Builders  Screenshot-9
    For the next part, we will combine the usage of sculptures and misc. decor. They are pretty much the same stuff, sculptures are just a sub category of misc. decor. There are many items to sort through and it can be intimidating to locate just what you need. If you mouse over the arrow icon to the right, it says click to increase the size of the catalog. Below it is an icon that allows you to filter. You can sort from EP's, SP's and store content with it. It is very helpful if you know where the item you are looking for is from. Clutter from this subsection can make or break the build. What's the rule? Less is more. You may want to go clutter crazy, but keep in mind that each item of clutter increases your file size. Too large and it could cause game lag, or if you plan to upload, a large file may not go through. Plus, there is aesthetics. Too much of anything is never good. Be sparing with your clutter. Have enough that it makes sense, just like real life. You'd want in a bathroom, toilet paper, a towel rack, a towel next to the shower, maybe some soap, etc. There are a few other decorative pieces as well, but in general, don't go hog wild.
    Here is the filter menu.
    Building Basics ~ Lessons for Beginning Builders  Filter
    I added one bit of clutter, the globe. Our room is small and does not require too much.
    Building Basics ~ Lessons for Beginning Builders  Screenshot-10

    Create a Style or CAS -
    CAS is a wonderful tool that allows you to really customize and individualize your design. It has it's temperamental moments, but if you have patience, you can really create an amazing space with it. So how does it work? First, select the icon in either build or buy mode. You can also press 'R' on the keyboard. Next, it pulls up a CAS menu with patterns/textures ranging from fabrics to misc. Some take a bit to load, depending how many are in the particular category. While in CAS, you will want to remember the pattern rules. This is where you will fine tune your walls and floors, as well as furnishings and clutter. There are some neat tricks to play around with in CAS. If you note, there are color channels. 1-4 of them. Each one can be customized if you select it. You can also save your patterns that you CAS for future use which is done by clicking the folder icon on the very right. You can add a pattern to favorites by clicking the heart. Only do that if you plan on using it regularly. Below the channels, you will see the color wheel. Below that are three different selections. One is a color palette with pre made colors. In the beginning, you will find yourself wanting to use these. I suggest you don't. Do not depend on these colors. Create your own or use a hex code from a color palette. The second position is the color wheel where you can manipulate your color. It takes a bit of practice to get comfy with it, but once you do, it is a piece of cake. Last position is the color numbers where you can enter in a hex code or red, green or blue hues. The hex code is the easiest to deal with. Simply locate your hex code, enter it and away you go. Another remarkable function of CAS is Grab Preset. Mouse over the very left of where your on board patterns show up. There are six dots, three in a row going vertical. Grab it and you can transfer the preselected patterns to another object.
    Building Basics ~ Lessons for Beginning Builders  Preset2
    It is a time saver. But make sure you do mouse it over the correct object. Sometimes if you move to fast, you may CAS the wrong thing. In that case, note the undo button on the bottom left. After selecting undo, it will take you to the other pattern, but after it loads, simply click on the intended CASable object. The tool seems difficult at first, but once you get the hang of it, it can be your best friend.
    Now we have a fully CASed room. Notice I kept the wood grains/color the same. This helps to unify the room. Also, there is a bold pattern in the sofa and matching chairs, so I did not use a pattern in the rug and curtains, but texture instead. I followed the colors of the palette.
    Building Basics ~ Lessons for Beginning Builders  Screenshot-11
    Building Basics ~ Lessons for Beginning Builders  Screenshot-12

    Lighting -
    Lighting is so important to any room. It doesn't just allow visibility, it creates a mood. Again, style of your home plays an important role in selecting the right type of lighting. Look at the different styles and eliminate the ones that you know you will not use. Then go back and see which are left. You do not want to have an overabundance of lighting. Less is more still holds true here. A smart thing to do with lighting is to go from light to dark in build/buy mode. That way, you can see how the lights you have chosen will look in each environment. To do this, click the ying yang looking icon or press 'L' on your keyboard. If you spot some dark areas and/or shadows you do not want, you can use buydebug lighting. To access buybebug, first open your cheat menu by pressing control shift c on the keyboard. Next, enter the code, testingcheatsenabled true. Just like that. Now open cheat window again and enter buybebug. Once open, you will note six subsections. You want the one on the furthest right, titled misc. objects. Scroll through and you will find different sizes of lighting. Use your head on which size best fits the area. If it's a shadow in the corner, you will only need the one by one light. If you want to do an entire room, like a garage, you may want to use the circular lighting. When it comes to windows and floor lighting, I would suggest you avoid placing them near each other. Also, in a bedroom, if you have lights on nightstands, you may not need wall lights above. That might be overkill of lighting. Less is more and do not be afraid to use buydebug. Do not simply rely on it, but do know you can use it. Another cool thing is you can set the color and intensity of the lighting. If a light is really bright, it is nice to be able to dim that individual light. To do that just click on the light and the menu will appear if you are in live mode. In build/buy mode, use shift click. Another thing that really adds to mood is using the flame color as opposed to the white default lights. It adds a nice cast of light and workable shadows that make the surrounding more homey.
    Here, I used two overheads for the separate spaces and a floor lamp next to the chair that is away from the window. When I turned day to night, I could see shadows, so added three buydebug lights to the corners.
    Building Basics ~ Lessons for Beginning Builders  Nightlights
    Building Basics ~ Lessons for Beginning Builders  Screenshot-14-1

    This concludes your lesson in interiors. I hope it helps and do not forget to ask for help with any aspect of your build. Remember, there are no stupid questions. So fire away. Happy building!
    Completer interiors...
    Building Basics ~ Lessons for Beginning Builders  Screenshot-15-1
    Archivist
    Archivist


    Posts : 220
    Join date : 2010-12-04

    Building Basics ~ Lessons for Beginning Builders  Empty Re: Building Basics ~ Lessons for Beginning Builders

    Post  Archivist Mon Sep 22, 2014 10:54 pm

    Lesson 3 - Landscaping

    The first thing you see when you approach a house is the landscaping. When done right it can sell a house. You want to make sure your landscape compliments your build, not distracts from it. This lesson is all about learning the landscaping tools and giving your build some curb appeal! The first thing we're going to do is learn the basics.

    First step is your terrain. With the terrain tool you can raise the ground, lower the ground and create ponds. When you get further along, you may choose to build a house on a hill or raise the ground so you can have a walk out basement.For now, were going to give your flat yard a more natural appearance by adding some slight curves to the ground. Taking the raise terrain tool set to a medium circular brush and run the tool all around your lot.

    Building Basics ~ Lessons for Beginning Builders  Terrainpaintandtools

    Building Basics ~ Lessons for Beginning Builders  Raisesoftenterrain

    It will be very lumpy, but don't worry, the next step we will soften it. Change the tool to soften terrain.

    Building Basics ~ Lessons for Beginning Builders  Screenshot-343

    Go over the lumpy areas until they are slightly raised; you'll see that this alone gives the ground a more natural realistic appearance.

    Building Basics ~ Lessons for Beginning Builders  Screenshot-345

    Now is a good time to plan where you want your walkways, driveway/parking spaces and fences. I'll often use terrain paints to give myself a guide about where I want things. You can use floor tiles if you want your walkways to have more finished edges.

    Building Basics ~ Lessons for Beginning Builders  Screenshot-346

    Floor tiles will flatten the ground you place them on, you may find that there are odd bumps in the terrain after placing them, but no worries! Just run over the location with soften terrain tool.

    Building Basics ~ Lessons for Beginning Builders  Screenshot-347

    Tip! The parking space for a car is 7 tiles long, and 12 tiles long for the fire truck. When placing parking lots on a community lot, using the free metered parking space from the store just adds an extra detail. Parking spaces and bike racks are found in the buy mode under cars.

    You can now place a fence or hedge around your lot. I never place the fence on the outside edge of the lot as it can cause problems, at least it did a long time ago. I usually place mine on the 2nd tile in. If you want your sims to be able to access the fenced off area, make sure you include a gate.

    Building Basics ~ Lessons for Beginning Builders  Fencesandgates

    Building Basics ~ Lessons for Beginning Builders  Fencegatetab

    Here I choose to use a hedge and gate in front of my driveway. You can place them where ever it will work best for you. You don't need to leave breaks in the fence for a gate, it will pop in where want it.

    Building Basics ~ Lessons for Beginning Builders  Screenshot-348

    The next step is placing your plants. Plants are divided up into 4 categories. Trees, shrubs, Flowers, and rocks (I know they aren't plants, but they are there!).

    Building Basics ~ Lessons for Beginning Builders  Plantsandrocks

    Building Basics ~ Lessons for Beginning Builders  Labeledlandscapetabs

    If you have a large space, shrubs work well to fill, then mix in flowers. Sometimes rock gardens with few plants are created. It just depends on what style of architecture you have. Below I've included a tutorial that Yanti created for TSSI on landscaping for specific architectural styles.

    With this lot, I'm just going to show you how to place your plants. You don't want to have a bare landscape. You want it to be lush and full, like it's been there for a years. The first thing I'm going to do is turn on the cheat moveobjects on (aka MOO).

    This will allow plants to overlap. Then, I'm going to keep my finger on the alt key as I place plants. Alt allows you to place items "off the grid". Each time I place a plant I twist it a little so they don't look exactly the same.

    I'm going to start off by placing some larger flowers (you can use shrubs too) and then some smaller flowers.

    Building Basics ~ Lessons for Beginning Builders  Screenshot-350

    Building Basics ~ Lessons for Beginning Builders  Screenshot-351

    For a little more dimension I'm going to place some ferns in with the small flowers. Ferns can be found under shrubs. Next I'm going to place some trees. Trees should frame your house, not block it.

    Building Basics ~ Lessons for Beginning Builders  Screenshot-352

    I'm also going to add some ferns around the trees, and dandelions make great plants to use if you have a little extra space to fill.

    A little note - Trees and large flowers and shrubs have several sizes, sometimes it's easier to pick out all of the large, medium, or small versions depending on what you're doing.

    Building Basics ~ Lessons for Beginning Builders  Screenshot-349

    In this demo, I used all small versions of the hydrangea. Make sure you don't place your plants too close to the house. If they are too close you might find branches peeking through the walls.

    I went ahead and added a small patio off of the back door and a couple small groups of flowers. I moved the garbage can (which must stay outdoors) so it's out of sight. It can be CAS'd to match its surroundings.

    Building Basics ~ Lessons for Beginning Builders  Screenshot-353

    I decided to place a small garden plot off the kitchen, which I defined using the monorail fence (the 2nd base game fence listed under fences). I also moved the mailbox near the front door. Its really important that when you place the mailbox near other items that you test and make sure it's usable. Adjust the location if you need too. You can also CAS the mailbox any color you want.

    Now we have our grounds laid out, but the terrain is all very plain. Adding terrain paints is a very simple way to give your house more curb appeal.

    Building Basics ~ Lessons for Beginning Builders  Terrainpainttools

    Building Basics ~ Lessons for Beginning Builders  Labeledterrainpaints

    The first thing I'm going to do is use the dirt paint under the plants.

    Building Basics ~ Lessons for Beginning Builders  Screenshot-354

    Trees will disappear if you're too close to them in build mode, so you'll have to paint under them from a distance.

    Next I'm going to fill the garden plot with dirt. I want my dirt to stay in the fenced area so I'm going to place the floor tile around it. Terrain paints wont place under floor tiles, so this is a quick and easy way to keep the area "clean". I'm just going to delete the tiles when I finish.

    Building Basics ~ Lessons for Beginning Builders  Screenshot-355

    Building Basics ~ Lessons for Beginning Builders  Screenshot-356

    After I paint the dirt, I'm going to add some more paints to the grass. I always use the small brush at the softest setting for this as I just want subtle changes. The first thing I'm going to do is add a worn path from the gate to the patio.

    Building Basics ~ Lessons for Beginning Builders  Screenshot-357

    I achieve this by making short quick sprays, I don't hold the mouse down, I just go right and left with short bursts (similar to painting with spray paint). After I have a light path with the dry grass, I do over it again with the light dirt..but not nearly as much. Usually I just do a single click in multiple area's.

    Next I'm going to add a little oomph to the grass by using the short dark grass with the medium brush on the softest setting. Again I'm going to do quick bursts over the existing terrain paint. You can even add a smidge of flowers (clover, yellow, pink, purple) for a little extra.

    Building Basics ~ Lessons for Beginning Builders  Screenshot-358

    When you're done with the terrain paints, it's time to add a few little extras. I'm going to place lounge chairs on the patio, a sprinkler in garden area, and maybe a flamingo or two for fun in my flowers. When you're looking for outdoor items (like the sprinkler) you'll need to sort buymode by room, then choose the BBQ icon. When I've finished placing my decorative items, I'll place my lights. I always find it's best to place lights at night. Either hit the day/night mode button or hit L. Outdoor lights can be found in the outdoor tab or the lighting tab (next to ceiling lights). The first lights I always place are on the walls, near doors. After that I place lights in the flowerbeds and walkways.

    Building Basics ~ Lessons for Beginning Builders  Screenshot-359

    Building Basics ~ Lessons for Beginning Builders  Screenshot-361

    ~~~~~~~~~~~~~~~~~

    GREEN DREAMS by Yanti

    Most of us builders love to create a pretty garden for our simmies. An outside space where they can be one with nature and enjoy some outdoor activities with their family and friends. The question is how do we go about it and where do we start? The first thing you must decide is what style of garden you are hoping to create. The style depends obviously on the style of your build. So the landscaping style will vary according to the style of architecture of your house. For example, if you are building a country home for your sims then you should go for the rustic look, or the cottage garden or a farm house style garden. To illustrate my point here is a picture of a cottage garden:

    Building Basics ~ Lessons for Beginning Builders  7109235707_1c0c80f49f_z

    As you can see from the picture I have chosen stone pathway and the planting consists of flowers, ferns, climbing plants and trees including fruit trees to emphasize the cottage/farm house theme. While choosing the flowers for the garden it is very important to choose the right colour. If your house has a yellow/brown/beige exterior wall it is better to choose red, yellow and white flowers for the garden. The terrain paint tool also comes in handy in creating the right colour scheme. Make it look as realistic as possible. So use the terrain paint to create patches of weeds or a ground full of fallen leaves or flowers. Also, suitable garden decorative objects like the scarecrow and the wheel barrow help to create the right ambiance.

    To illustrate my point further let’s consider another style of garden. Here is the picture of a French chateau garden:

    Building Basics ~ Lessons for Beginning Builders  7109235965_6f92f7eb7e_z

    Since this is a garden for a chateau we are going for a regal, well-manicured garden look. So it is best to create a maze of hedges with ferns, bushes, trees and flowers in between. The path between the hedges is brick which is more suitable to the build. Notice the colours chosen for the flowering plants and trees. It is red and yellow which goes very well with the peach brick exterior wall of the chateau.

    So now you have chosen the style of garden you are hoping to create. How do you start with the landscaping? It is simpler to first create a path stretching from the street to the front door all the way around the house to the back door leading to the garden. Again the colour of the path and the type of path depends on the house you have built.

    If you want to fence your garden to allow your simmies some privacy it is better to do it first before we begin planning where the planting beds are going to be.

    To avoid repeating the same planting pattern we must alternate bushes/ferns with flowers and trees. You can also use potted plants here and there to break the monotony of the planting pattern. Potted plants certainly enhance the beauty of a terrace or a courtyard garden too. Gazebos, arches, ponds, swimming pools, fountains, bridges also help to beautify your garden. Also do not forget to put a bench for your simmies to sit outside and enjoy their garden. Here are some examples:

    Building Basics ~ Lessons for Beginning Builders  6963162864_0aa325d643_z

    The arched walkway which is suitable for a Victorian garden

    Building Basics ~ Lessons for Beginning Builders  7109235779_309cd8ef93_z

    Adding a pond always helps to create the charming rustic garden

    Building Basics ~ Lessons for Beginning Builders  7109235829_772835db93_z

    Fountains with beautiful statues always add grandeur to a garden.

    Be creative with your garden and give your imagination free reign. Welcome the summer in your simmies garden by introducing a riot of colours in the planting or maybe give your simmies the feeling that they are on a vacation on an exotic island by adding an outside kitchen or a bar with a swimming pool! The sky is your limit because in simmie world there is always the ever helpful motherlode cheat.

    ~~~~~~~~~~~~~~~~~

    A proper landscape can make the home! Remember, you want this and not that!

    Building Basics ~ Lessons for Beginning Builders  Beforeandafterlandscaping-1-1
    Archivist
    Archivist


    Posts : 220
    Join date : 2010-12-04

    Building Basics ~ Lessons for Beginning Builders  Empty Re: Building Basics ~ Lessons for Beginning Builders

    Post  Archivist Mon Sep 22, 2014 10:55 pm

    Lesson 4 - Building Cheats

    First thing in cheats is learning how to access them! To enter the cheat menu, press ctrl shift and c at the same time. Some cheats (such as buydebug) stay hidden until TestingCheatsEnabled true/false (aka TCE) is entered.

    TestingCheatsEnabled
    Opens up a bunch of game play cheats (see our cheats lists for detailed information) allowing you to shift and click lots other than your home lot (community and other sims homes) and go into build/buy mode.

    Buydebug
    Opens up a hidden type in buy mode. Allows you to place hidden objects (world and community lot objects, toy box toys) spawners (gem/metal, insect, seed), fully grown plants, and even the Mysterious Mr. Gnome!

    constrainFloorElevation (CFE) on/off or true/false
    Allows all terrain adjustments regardless of objects, Sims, and other structures on them. Walls, floors, and objects will move with the terrain, allowing you to create sloped walls and floored hills. However, placing new walls/floors will still flatten terrain, and placing objects will still require the terrain to be flat initially if the objects normally require it.

    DisableSnappingToSlotsOnAlt on/off
    When on, objects will not snap to slots while holding ALT. Useful for placing objects such as chairs near tables without them snapping or placing counters near other counters, etc.

    MoveObjects on/off (MOO)
    Removes footprint limitation for all object placement in Buy Mode and Build Mode. Removes limitations placed on hand tool for when objects are in use or for objects that normally are not movable. Is known to cause issues with game elements, routing, hidden object generation and manipulation, etc. Do use with discretion and make sure to playtest! Note that using this cheat allows you to move and delete objects that normally cannot be manipulated such as Sims.

    PlaceFriezes on/off
    Sets the foundation to frieze. See uses

    Technically not cheats, but helpful hotkeys

    ALT
    Holding the alt key while placing object allows you to place the object off the grid and be able to angle items for a much more realistic appearance.

    M
    When placing an object on a surface (counter, table), hitting “M” will move your object between the available slots.

    Now I’m going to show you some very basic things so you understand how each cheat works (with the exception of CFE, it is a future lesson). I’m going to use a kitchen but you can apply these cheats to every room in your house! The first thing I’m going to do is place some counters and add an island.

    Building Basics ~ Lessons for Beginning Builders  Screenshot-367

    I have my counters placed, but I want the counter and island pieces to touch so they are one item. Right now if I try to move the island into the counter my green box around the island will turn red and the game won’t let me place it.

    Building Basics ~ Lessons for Beginning Builders  Screenshot-368

    I’m going to turn on the cheat MOO by entering moveobjects on into the cheat menu. Now the red box stays green and it lets me merge the counters together.

    Building Basics ~ Lessons for Beginning Builders  Screenshot-370

    This looks much better, but I think my kitchen is lacking counter space so I’m going to rearrange my counters and appliances.

    Building Basics ~ Lessons for Beginning Builders  Screenshot-388

    I like this layout much better, so I’m going to hold down the alt key and move the counter so it’s not in the middle of the sink but every time I get close to the edge it reattaches to the island.

    Building Basics ~ Lessons for Beginning Builders  Screenshot-371

    Next I’m going to use the disable snapping to slots cheat by entering disablesnappingtoslotsonalt on in the cheat bar. Now I can hold ALT and move my counter into place.

    Building Basics ~ Lessons for Beginning Builders  Screenshot-373

    Next I’m going to let go of the alt key and allow the other island pieces to snap to the one I just moved into place.

    Building Basics ~ Lessons for Beginning Builders  Screenshot-374

    I’ll add some bar stools to the counter, but I’m not going to hold alt when I place them. I want to make sure they snap into place so they can be used by sims. Dining chairs and bar stools will automatically snap to the available space at a counter, table or desk.

    Building Basics ~ Lessons for Beginning Builders  Screenshot-375

    Then I’ll add some flowers to the counter. I’m not sure where I want them placed so I’ll hold them over the counter and hit “M” until it places in the location I want. The disable snapping to slots cheat does not work on items that are placed on surfaces. It also does not work on wall décor, doors or windows.

    Building Basics ~ Lessons for Beginning Builders  Screenshot-377

    Building Basics ~ Lessons for Beginning Builders  Screenshot-378

    I’ve place a painting on the wall as well. A lot of wall objects (other than curtains) can also be adjusted with the alt key. Just grab the object and hold the alt key as you move the item up and down on the wall.

    Building Basics ~ Lessons for Beginning Builders  Screenshot-379

    I’m heading outside next to plant a garden! Besides the fact that I’m just building, my sim has no seeds to grow any plants. I’m going to go into debug so I can plant some fruits and veggies. Open the cheat menu and enter buydebug. Next time you go into buy mode, you’ll notice the ? above the normal boxes.

    Building Basics ~ Lessons for Beginning Builders  Buydebugtab

    When you click on that it will bring up several menus, I’m going to go into the garden spawners and place a few of the auto soil plants. Some plants, like the plasma fruit from the Late Night EP can not be found in debug.

    Building Basics ~ Lessons for Beginning Builders  Screenshot-380

    For a little extra fun, I went into the misc section and grabbed a Mysterious Mr. Gnome for my garden.

    Building Basics ~ Lessons for Beginning Builders  Screenshot-381

    The PlaceFriezes cheat needs some explaining before you jump into it. A frieze is a wide section of wall, in TS3 the frieze is very similar to a foundation but it is considered another floor. The game will only allow you to build 5 floors high, so you will want to use them carefully. The frieze can not attach to walls without CFE. Another thing to keep in mind is that it is slightly taller than the foundation. In TS3 height is measured in stairs. A normal wall is 16 stairs, foundation is 4 and the frieze is 6. Because of that it makes for good visuals but, but it can be difficult to build with. Turn on the friezes by entering placefriezes on in the cheat menu. Sometimes it won’t work if you enter it from the foundation tab, it’s a good habit to start entering it from the build tab.

    I’m not actually going to create anything here, just show you a few things you can do with the friezes. I’ve started with a foundation, wall, and stairs.

    Building Basics ~ Lessons for Beginning Builders  Screenshot-382

    Then I’ll add the frieze and flooring tiles on the the frieze and the 2nd floor. Here you can see how the 2nd floor grid lowers to the frieze level.

    Building Basics ~ Lessons for Beginning Builders  Screenshot-384

    Next I’ll place stairs from the 2nd floor to the frieze and then the frieze to the foundation to create split level stairs. From here you can see the size difference in the frieze and foundation.

    Building Basics ~ Lessons for Beginning Builders  Screenshot-385

    Going up to the 2nd floor you can use the frieze to create a sunken room. Just surround the area you want to be lower and place your friezes then place stairs going up to the 3rd floor.

    Building Basics ~ Lessons for Beginning Builders  Screenshot-387

    The friezes can also be used for creating an accent on a modern roof.

    Building Basics ~ Lessons for Beginning Builders  Screenshot-386

    There you have it! Your basic building cheats and how to use them, with the exception of CFE. CFE has an entire lesson dedicated to it!
    Building Basics ~ Lessons for Beginning Builders  Icon_user_profile Building Basics ~ Lessons for Beginning Builders  Icon_contact_pm Building Basics ~ Lessons for Beginning Builders  Icon_contact_www Building Basics ~ Lessons for Beginning Builders  Icon_fb Building Basics ~ Lessons for Beginning Builders  Icon_twitter Building Basics ~ Lessons for Beginning Builders  Icon_pinterest
    Archivist
    Archivist


    Posts : 220
    Join date : 2010-12-04

    Building Basics ~ Lessons for Beginning Builders  Empty Re: Building Basics ~ Lessons for Beginning Builders

    Post  Archivist Mon Sep 22, 2014 10:56 pm

    Lesson 5 - CFE Basics

    What is CFE? It is Constrain floor elevation. This cheat is used to manipulate the constraints of floor elevation and the build objects above it. Normally, constrain floor elevation is on, which allows you to manipulate most terrain, but not terrain under build/buy objects. To use the cheat, open up the cheat window...control + shift + C , now type in constrainfloorelevation off. Just like that. You can also use constrainfloorelevation true/false, but for the purposes of this tutorial, I will use on/off. Notice with this cheat, we are turning OFF the game feature. Most always, it is on. In this case, 'off' allows us to manipulate, 'on' does not. For now, turn the cheat code off, by typing constrainfloorelecation on. It takes some time to wrap your brain around the opposite function, but soon enough, it will become second nature.

    In this lesson, we will address
    ~Introduction to CFE - playing around with the cheat
    ~Attached garage
    ~Split level room, in two styles
    ~ Inspirational images of what CFE can do - builds from members of the community

    Introduction to CFE
    Let's just get a feel for what CFE is and what is does. Turn on (off) your cheat in the cheat window. constrainfloorelevation off
    Building Basics ~ Lessons for Beginning Builders  Opencfe
    Let's play around, but learn at the same time. I am going to draw a backward 'L' shaped wall to start 6x6.
    Building Basics ~ Lessons for Beginning Builders  Screenshot-83
    Now to add scaffolding. I do this by using stairs in the ground. You should know a few things about stairs. One click of the stairs equals the height of the foundation. Going four stairs down into the ground equals wall height. Therefore, two stairs down would give you a half wall. Let's practice and see first what going one stair click below ground does to the structure. *hint* You can delete the stairs by pressing control and clicking on the stairs. This is helpful to set your walls in place. Once you set your stairs and deleted them, add a wall, or two, just make sure you have a grid. It should look like this...
    Building Basics ~ Lessons for Beginning Builders  Screenshot-84

    Let's go to terrain tools and level terrain. We will start with the walls without foundation. I am going to level just one part of the 'L' to show you what the remaining side looks like. Stretch it like so...
    Building Basics ~ Lessons for Beginning Builders  Screenshot-85
    It should now look like this...
    Building Basics ~ Lessons for Beginning Builders  Screenshot-86
    Let's see what going down two stairs does on the other side of the 'L' I am only leveling the three spaces of the outmost part. Once you drag and release, it should look like this...
    Building Basics ~ Lessons for Beginning Builders  Screenshot-87
    Go back to the other side so we can see what four stairs looks like. Place your scaffolding walls and use terrain tool to level. You should have something like this if you drag over the middle two slots.
    Building Basics ~ Lessons for Beginning Builders  Screenshot-89
    You may be more confused as ever, but you are not trying to build anything here, just getting a feel for it by playing around. By understanding the basic concepts, you will soon be able to do all kinds of cool stuff with CFE. A little later on, we will show some examples of members' creations that have utilized CFE.

    Attaching a Garage
    First thing you want to do is build a basic structure. Remember, this is practice, so a simple square will do. We are not concerned about rooms in this tutorial. Build with foundation and walls on top. For now, also remove roof and turn off autoroof.
    Now, to turn on our cheat, constrainfloorelevation off. Next, go to buy mode and select under vehicles, the car - spot parking place. This will help guide you to the size garage you will need. The car space is 3 wide by 7 long. We will also need enough spaces for the garage door, which is 4 wide by 1 long. Place your parking spot at least one space behind your home foundation/wall. We will draw the walls now. I like to do my single car garage at least 6 wide and 10 long. You will notice the corners of the foundation build have warped a bit. On your dashboard, go up a floor so that you have grid lines above the walls. It should look like this...
    Building Basics ~ Lessons for Beginning Builders  Screenshot-74
    Now that you see what CFE has done, go down a floor so the grid above the walls is gone. Go to terrain tools and select level terrain. Start at the uppermost corner of the build and drag (hold the left click button on the mouse) down and over so that it leads from the foundation over the walls of the garage. Let go of left click. This is what you should have now.
    Building Basics ~ Lessons for Beginning Builders  Screenshot-76
    Next step is to add walls to the lowered walls of the garage. It should look like this..
    Building Basics ~ Lessons for Beginning Builders  Screenshot-77
    Now we want to delete four spaces of the lower wall. This is where our garage door will go.
    Building Basics ~ Lessons for Beginning Builders  Screenshot-78
    We will now fill that empty space with wall again. Just draw walls into the empty for spaces and don't panic, the walls above will raise. This is perfectly normal.
    Building Basics ~ Lessons for Beginning Builders  Screenshot-79
    Once again, go up a floor to expose grid lines above the walls. We want to level now to get rid of the higher walls. With level terrain selected, start at the left corner of the raised wall and drag to the right. Then let go. Your top should now be level.
    Building Basics ~ Lessons for Beginning Builders  Screenshot-80
    Next, all that is left to do is add the door. You can find garage doors in the door selection in build mode, or in vehicles in buy mode. Select your door and center it within the CFE wall we created.
    Building Basics ~ Lessons for Beginning Builders  Screenshot-81
    You now have an attached garage. To make it more realistic, you can add foundation and stairs to create a landing to allow sims to walk into the garage from the house. Simply go a flow down to eliminate the higher grid lines, add foundation to the upper corner, and some stairs. I like to use a 2x2 foundation, add stairs, railing and fencing, and a door like so...
    Building Basics ~ Lessons for Beginning Builders  Screenshot-82
    I suggest you practice this technique a few times before you use it for a real build. See if you can do it without reading a tutorial. When you grasp it, and do use it for a build, keep in mind that CFE can affect other objects in game, so keep your build very minimal when adding your garage so mistakes do not occur. When you're first starting out, fixing CFE mistakes can be a nightmare. Take it one step at a time.

    Split Level Rooms - in two styles
    Split level rooms inside a build add dimension and shows off skill and knowledge of CFE. There are two methods to achieve the same look. The first we will look at involves foundation, the second without.
    Foundation Method -
    Just like adding an attached garage, you need practice this technique before creating a build to use it in. First, draw your foundation into a square. An 8x8 square will suffice.

    Have your cheat activated and attach walls in a square to your foundation just to the side. I used 8x8 for this as well, here is how it should look...
    Building Basics ~ Lessons for Beginning Builders  Screenshot-90
    Now, to level, stretch your level tool over from the foundation to the raised walls.
    Building Basics ~ Lessons for Beginning Builders  Screenshot-91
    Draw walls over the entire thing...
    Building Basics ~ Lessons for Beginning Builders  Screenshot-92
    Add stairs and such...
    Building Basics ~ Lessons for Beginning Builders  Screenshot-93
    Now you know the basics. Once you feel more comfortable with some practice, you can create things like this...
    Building Basics ~ Lessons for Beginning Builders  Screenshot-95
    If you notice with this split level method, you have grid lines. This is one reason why I prefer the next method. The grid lines make decorating a bit more tedious. Also lighting issues can arise.

    No Foundation Method -
    First thing you want to do is make sure your terrain is flat. Do this by clicking on 'flatten lot' in terrain tools. Now, we want to raise the terrain. I will select the large square to do this. Pick out an area on your lot to start with, just one click of the mouse.
    Building Basics ~ Lessons for Beginning Builders  Screenshot-94
    Next we will level terrain to include our raised portion and drag it to our desired size. I chose 7x7.
    Building Basics ~ Lessons for Beginning Builders  Screenshot-96
    Let's draw our walls now. Start around the edges of your raised portion, then draw on the flat ground. DO NOT CONNECT yet.
    Building Basics ~ Lessons for Beginning Builders  Screenshot-97
    Connecting can be rather tricky. Turn your cheat on (off) and carefully connect like so. *hint* Keep your arrow low and as you release your click make sure it is still, otherwise your walls will go to the side.
    Building Basics ~ Lessons for Beginning Builders  Screenshot-98
    Once they are connected, you will have an uneven structure.

    Let's level, starting from the highest elevation and dragging to the lowest.
    Building Basics ~ Lessons for Beginning Builders  Screenshot-99
    Notice after you level, your walls are taller in the lower elevation.
    Building Basics ~ Lessons for Beginning Builders  Screenshot-100
    Unlike the first method, these taller walls still count as one level. Next, we are going to delete one wall section on our taller level. We are going to add stairs but for them to act like stairs for split level, we need the build to not be complete.
    Building Basics ~ Lessons for Beginning Builders  Screenshot-101
    Now I have added stairs. If you notice, the bottom floor is no longer level. We want to level what we can without covering the stairs with the ground. Select your level terrain tool and measure on space away from the bottom of the stairs, drag it and release. The floor still is not level. To compensate, use your soften terrain tool and drag in spaces until it is smooth. I will now add walls to the stairs to add more dimension. It will look all kinds of messed up here.
    Building Basics ~ Lessons for Beginning Builders  Screenshot-102
    Fill in that empty spot of outer wall we deleted, then go up a floor. We are going to level once more. Again starting from the highest point and dragging to lowest. It should look something like this.
    Building Basics ~ Lessons for Beginning Builders  Screenshot-104
    If you notice the upper level flooring, you will see the ground is uneven. Level that. Then on the bottom, level it, continuing outside the walls. You will need to fix the top again by going up a floor and leveling. Once you are through, you should have something like this.
    Building Basics ~ Lessons for Beginning Builders  Screenshot-105
    Keep practicing this technique with different sized of terrain raising. You'll be a pro before you know it.

    Inspirational Images from Community members -
    With CFE, your imagination knows no limited to your creativity. Many cool things can be done with it. As with any skill, it takes time and patience to master it. Most will tell you no matter how good they are, they're still learning. Here are some examples of creations that can be accomplished with CFE.

    MeestorMark-
    You can create unreal things with CFE that couldn't be done without it. Take for instance this work called Spongeling Park...
    Building Basics ~ Lessons for Beginning Builders  Markcfe
    Interesting concepts can be applied to make a wonderful home, exceptional, like his work Brothshade...
    Building Basics ~ Lessons for Beginning Builders  Markcfe2
    Peacemaker_ic -
    Amazing depth can be added to builds by using CFE to manipulate the terrain and build off it like in Peace's Sandstone Ridge Usonian...
    Building Basics ~ Lessons for Beginning Builders  Peacecfe
    Sometimes CFE is used to enhance real life aspects and treatments as seen in his work, The Okemos...
    Building Basics ~ Lessons for Beginning Builders  Peacecfe2
    SimEve -
    In her first work, Tanjun, CFE has been used to elevate height and add interest to the build...
    Building Basics ~ Lessons for Beginning Builders  Eviecfe2
    Salida del Sol has a clean, sharp look due to CFE archways and elevation. It is amazing how something that looks so simple can be puzzling. Once you understand CFE though, the things you can do are limitless...
    Building Basics ~ Lessons for Beginning Builders  Eviecfe
    The Unicorn Sanctuary had a unique roofline done with CFE as well as pergolas and bridges...
    Building Basics ~ Lessons for Beginning Builders  Eviecfe3
    LightSide -
    The New Kinjinto has a unique appearance as a result of his masterful skill with CFE. Unique architectural detail can be done with this skill as well as sculptural aspects...
    Building Basics ~ Lessons for Beginning Builders  Lightycfe
    This next pic is not a build, but an elaborate ceiling created for a TSS challenge called Picture Perfect...
    Building Basics ~ Lessons for Beginning Builders  Lightycfe2
    Linday -
    Elegance and interesting work can be seen within the roofline in her build Maison Paix...
    Building Basics ~ Lessons for Beginning Builders  Lindaycfe
    Finally, SS Amphitrite boasts knowledge in CFE by creating a yacht of all things. This could not have been done without CFE...
    Building Basics ~ Lessons for Beginning Builders  Lindaycfe2


    Last edited by cera13 on Sun Aug 25, 2013 5:53 am; edited 1 time in total
    Archivist
    Archivist


    Posts : 220
    Join date : 2010-12-04

    Building Basics ~ Lessons for Beginning Builders  Empty Re: Building Basics ~ Lessons for Beginning Builders

    Post  Archivist Mon Sep 22, 2014 10:56 pm

    Lesson 6 - Tips, Hints, and Tricks to Better Photographs

    Hello, talented community! I am amazed all the time at the creativity I see in these threads in Creative Corner. One thing I think about a lot is the only way we have to introduce our creations, is through pictures in showcase threads. I am by no means an expert with photographs, but in my time with Sims, I have received a lot of excellent advice and I'd like to share that with you.

    Showcasing a build is an important way to ensure you are supplying people who download a quality product. Essentially, it can make or break your success with downloads. You should be proud of your creation, and the quality of your showcasing should reflect that. I am going to give a few tips on how to make your showcase thread go from good to great.

    You've dedicated the time to building your creation, now it's time to give the showcasing the same respect. What do people want to view in a showcase thread? How much is too much? How little is too little? There is a fine line. There is no definitive way to answer that. I always ask myself how much time I want to spend looking at a build and go from there. The choice of how many pics is up to you, but...make sure they are quality.

    Check List -
    • First, make sure walls are UP when you start your pictorial process. Only a few things irk me more than walls down in showcase threads.
    • Time of day is important as well for exteriors. You will have better luck capturing a great photograph of the exterior is the sun is in front of the build to avoid shadows.
    • Have a sim in game. No one wants to see showcase pics in build mode.
    • Play around with your angles in camera man mode. This accomplishes two things. It allows you to plan your documentation process. Also, it helps you see if you've missed something, like CASing an object, or placing ceilings. (Can't tell you how many times I have done that and had to start over.) Speaking of camera man mode, maybe we ought to do a quick run through.

    Camera Man Mode -
    If you are new to this, it can seem daunting at first, but once you adapt, it becomes second nature.
    • Enter camera man mode by pressing 'TAB'
    • 'W' moves the camera forward.
    • 'A' moves the camera left.
    • 'S' moves the camera back.
    • 'D' moves the camera right.
    • 'Q' moves the camera down.
    • 'E' moves the camera up.
    • 'Z' Zooms out.
    • 'X' Zooms in.
    To accomplish angles...
    • 'Shift A' angles left.
    • 'Shift D' angles right.
    You can also move around with the mouse in camera man mode. I always hold right, but holding left works too.
    Practice a bit to get comfortable with it. The tool is relatively straight forward.

    Starting Out-
    Now that the basics are covered, it's time to get down to business. We will use a basic 20x20 build for this tutorial. It has a one bedroom, one bath, kitchen, laundry area, and living/computer space for the interiors. Exteriors are basic parking space and some landscaping. Ask yourself what you want others to see in your showcase. Are you particularly pleased with certain areas? How many pictures do you want of the space? How many will you present? This lot is very small, so one pic per area should be sufficient. For larger lots, I usually do two pics per room, if they are large and one for the rest.
    If you have ever watched a home channel or read a design magazine, you may be familiar with a home tour. I try to document my showcase as if I were doing a live tour of the home, starting with the front of the home, a couple, give or take, pics of the exterior, then straight into the home. Once inside, I try to photograph the area as if I were walking through it with a potential buyer. Let's begin with the pictures.

    The Exterior -
    Building Basics ~ Lessons for Beginning Builders  Screenshot-58
    I did this at eye level, for a sim that is. Some people choose to go overhead and look down, but I feel that works with larger builds, not so much with small. Some things, like the trees, are cutt off, but that is okay. We want an intimate shot to start things off. Sort of inviting your sims to walk in and see more. Next, I would do a couple more exteriors, but for the purpose of this guide, I will skip to interiors.

    Interior Showcasing -
    This will be picture intensive and a tad lengthy as there is much to cover. I will discuss with you how to get the most aesthetically pleasing pictures for your build. With that, what not to do will be covered as well.
    This is not rocket science and there is plenty of room for personal preferences. How I do it is not indicative of the way it is supposed to be done, it is merely a suggestion to help guide you into better showcasing. Going back to the reference of a home tour, I like to include the entry way as part of my starting out procedure.
    Building Basics ~ Lessons for Beginning Builders  Screenshot-59
    If you notice, I included a flower in the shot. This adds interest, shows perspective and depth. Not needed, but is encouraged. Let's move on the living space.
    Building Basics ~ Lessons for Beginning Builders  Screenshot-60
    Here is an overhead of the space for reference. It's a bit awkward because it is a small space with angled furniture. Ask yourself now, 'how do I fully represent that space in a pleasing way?' There are so many ways to capture this. I will start with a few of what not to do.

    The Fishbowl Effect -
    Building Basics ~ Lessons for Beginning Builders  Screenshot-61
    Here is an example of what happens will people try to get the entire shot in one pic. The pic is zoomed out all the way and you notice the computer chair and wall hangings are distorted, disproportioned and stretched. This is not a good picture to include in showcasing. Here are some more examples of the fishbowl effect...
    Building Basics ~ Lessons for Beginning Builders  Screenshot-62
    Building Basics ~ Lessons for Beginning Builders  Screenshot-63
    The bathroom is a common spot for fishbowling. It is usually the smallest room and very difficult to capture. There is an easy correction for this effect. Zoom all the way in. Move your camera back a touch. Do not try to capture the whole room. Instead, focus on a feature of the room. Keep you pics tight.
    Building Basics ~ Lessons for Beginning Builders  Screenshot-64
    Building Basics ~ Lessons for Beginning Builders  Screenshot-65
    Building Basics ~ Lessons for Beginning Builders  Screenshot-66
    Angling the camera allows you to get a bit more detail in as well as add some character to your pics. Also raise and lower the camera, take many pictures of the same subject with different angles and heights. Soon, you will learn to just "feel" the pic, and not need to take so many.
    One thing I have not discussed much is lighting. Too bright a room or too dark will muck your showcase up. For a dark room, you can add buydebug lighting in. That is accessed through pressing CTRL - SHIFT - C and typing into the cheat window 'TestingCheatsEnabled True', then 'buydebug'. The lights are only visible in buy/build mode, not in play mode.
    Building Basics ~ Lessons for Beginning Builders  Screenshot-67
    They are a great way to add more lighting without overdoing it with buy mode lights. For too much light, you can click on any light fixture and select intensity. Make a certain light(s) dim or select all. One other trick I like to do is changing the colors of the lights. For contemporary and modern builds, generally I will use white lighting. But the color choice of flame casts great shadows and creates a romantic ambiance.

    Overhead Shots -
    They are great for showing the entire layout of a build, but for individual rooms, I would not recommend doing this in your showcase thread.
    Building Basics ~ Lessons for Beginning Builders  Screenshot-68
    Building Basics ~ Lessons for Beginning Builders  Screenshot-69
    Building Basics ~ Lessons for Beginning Builders  Screenshot-70
    They leave out so much aesthetic value. If you flip through a design magazine, you almost never see overhead shots like this. There is a reason.
    Building Basics ~ Lessons for Beginning Builders  Interior20design20photographs4
    Building Basics ~ Lessons for Beginning Builders  Bedroom20interior20design20pictures
    Building Basics ~ Lessons for Beginning Builders  Home-interior-design-pictures-photos-images-galleries-of-home
    Walls Down -
    Don't do this!
    Do not think about it!
    You spent time covering the wall, adding art, show it off.
    The Right Way -
    I've shown you what not to do. Now we will cover the correct way, or quality way to capture a good pic.
    Living Space...
    Building Basics ~ Lessons for Beginning Builders  Screenshot-71
    I've centered the photograph between the computer desk and the sitting area. No need to get every little bit of objects. People are smart and their brain will fill in the missing pieces.
    Kitchen/Dining /Laundry -
    Building Basics ~ Lessons for Beginning Builders  Screenshot-72
    Here is a straight on shot on the three areas in one. Notice, no fishbowl and no overhead. It is intimate, yet shows just enough. I did this by a lot of trying to find the 'sweet spot'. In camera man mode, move the camera around. Keep your zoom all the way in. Rely of moving forward, backward and side to side. If you feel you need to zoom out, move back a touch and see if you can capture what you want that way. There is no harm in zooming out. Just be sparing with it. It's not black and white. There is room for grey.
    Bathroom -
    Building Basics ~ Lessons for Beginning Builders  Screenshot-73
    This shot is slightly overhead, but if you notice, I did not show any rooms besides the bath. I went with an angle to include as much information as possible, without fishbowling as well. How I accomplished this is by going up and back and up as far as I could without leaving the room, 'W and E'. Then, I angled the camera to the right. 'SHIFT D' I did not zoom out at all.
    Bedroom -
    Building Basics ~ Lessons for Beginning Builders  Screenshot-74
    Building Basics ~ Lessons for Beginning Builders  Screenshot-75
    Even though this is a small area, I decided to go with two photographs to properly document this space. Typically, most of my showcases have two pics per bedroom. For the first pic, I simply found the position I wanted by utilizing the 'W', 'A' and 'D' keys. I did zoom out a slight tad, just enough that my proportions are intact. Seeing as I have a wall with mirrors, I used that to my advantage to show the other side that the camera will not catch. Look for things like that within your own builds as well. Mirrors are always a great way to capture large amounts of information. In the second, I cut out a great space of the bed as it has already been seen in the previous. I included just enough to act as a place holder for the space. Also, I focused on the opposite side as I did in the previous pic and angled ever so slightly to create more interest.
    Your Showcase Thread -
    First and foremost, this is yours and you can do as you please. I've seen builders use the same threads, and others have a new for each build. What you do is entirely up to you. I like to keep it simple. My format is...
    • Title
    • Brief description of the build
    • Four to Five pictures
    • A link to a slideshow and/or Youtube video
    • Last, the download link.
    Honestly, I do not want to spend more than five minutes viewing at a time. Sometimes more is less. Other times, I do want to see more than a cover shot and links to other media, but like I said, it is individual preferences.
    Wrapping it Up -
    I hope you have enjoyed this guide and found some use for it. Quality pictures are not hard to do once you understand the steps. Plus they add so much more to your showcase. There are so many talented builders out there and I hope others will share their advice on this thread as well. If you have any questions, I will keep my eyes open. Feel free to ask, I will help how I can.

    Sponsored content


    Building Basics ~ Lessons for Beginning Builders  Empty Re: Building Basics ~ Lessons for Beginning Builders

    Post  Sponsored content


      Current date/time is Mon Mar 18, 2024 11:24 pm