Richdre wrote:This is a basic bridge tutorial. I don’t plan to cover anything other than placing a bridge and connecting roads to it. It’s intended for someone just starting out or someone who may have some CAW experience but is having trouble with bridges. It assumes that the reader has a limited amount of CAW experience. If you are brand new to CAW then I suggest that you at least read the Basic Road Tutorial which is in this section. I would encourage you to open up CAW and get familiar with the basic controls. There is a section at the end of this tutorial that has some additional tips so if you already know how to place a bridge you might want to skip down to the end.
OK lets get started. First you need a place to put the bridge. This can be a gully or a river. I’ll use a river. Open up CAW and create a new world. Now use the “valley steep tool” to create a river. I’m going to set the size of the brush to 15 because I know how wide I want the river to be. When you are done you should have something that looks like this.

OK we have a river. Normally I would use the “smooth tool” to smooth off the rough edges of the river but if you want to place a bridge. DON’T DO THAT YET. It will be much easier to level the bridge if you don’t. Now place the bridge in the middle of the river. You will notice that the bridge is sitting on the river bottom.

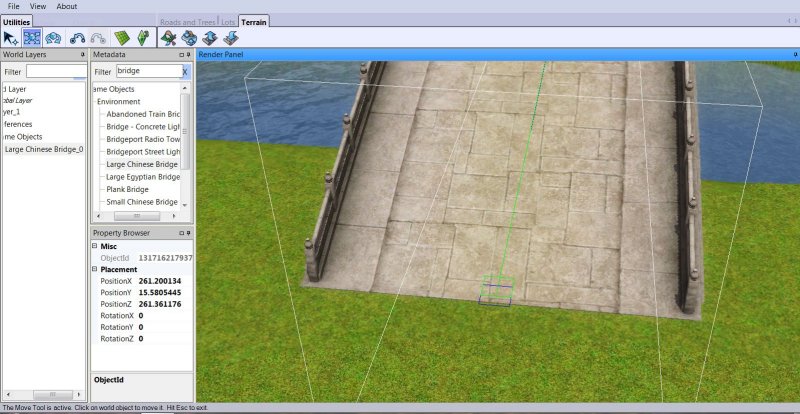
Now we need to raise the bridge so it is level with the surrounding terrain. Select the move button on the tool bar and then click on the bridge. Your screen should look like this.

Now we are going to raise the bridge so zoom in and raise the bridge until it is level with the ground. If you have changed the elevation around the river in any way you might have a problem because the elevation could be different for each side of the river. If so you will need to use the flatten tool to get them level. That’s why I said not to smooth the river bank. In my example both ends of the bridge are level with the ground because I didn’t change anything.
Next we will connect both ends of the bridge with a road. Select the road tool and add a section of road. Your screen should look like the screen shot below. Note: When I lay a piece of straight road I always use the grid.

Now that you have a straight road, turn off the grid. Move the road until you have it lined up with the bridge. Grab the blue connect box on the end of the road the pull the road up to the edge of the bridge. When you release the road the connect box should turn from dark blue to light blue. You might need to grab it again and move it slightly if it doesn’t connect the first time.

Repeat the operation on the other end of the bridge. Your bridge should look like this. Thats it, your done.

Bridge tips.
This section contains some tips and tricks that I have picked up along the way. I thought they might be useful even for someone that has CAW experience.
There is another method that is the reverse of the one I used. You can place the bridge, connect the roads and then dig out the river from under the bridge. Just be very careful that you do not disturb the terrain at the bridge ends. If you have used the sculpting tools on the terrain in this area just make sure that you flatten the area where you are placing the bridge. I think it’s important that you know how to do it both ways
When you select a bridge you will notice the blue boxes on the ends . These are the connect points for the roads. They are not all at the end of the bridge like the ones in my example Some of the bridges have them further in so select the bridge before you place the road to see where they are located. You need to draw your road up to that box or it will not connect. I sometimes think that EA does this kind of stuff just to test us.
If you lay down the bridges and then dig out the water you won’t need this tip. I prefer to get all of my basic sculpting done before I add roads and bridges so what I do is place the bridge I’m going to use and set markers at the ends, delete the bridge and then dig out the lakes and rivers. I use the lighthouse because its easy to see. I use markers for lots of things as I build and I have lighthouses all over the world.
If the river or lake is too large for the bridge you want to use you can use several bridges to cross the water. You need to use the flatten tool and fill in the land where you want to place the bridges or if you put the bridges down first just place them and add a road section between each bridge that you place. Then dig out the water under the bridges. A world building buddy of mine Rosewin has a nice screenshot of that and I’m sure she won’t mind if I use it.

Placing bridges and connecting roads isn’t hard if the terrain where the bridge and road connect is completely level. They snap together just like roads and intersections.
If anyone has comments or suggestions on how to make this tutorial better please feel free to post them. Have fun.


